Sharpening Axes
- By John Fenna
-
3
 Comments
- Last updated: 22/05/2018


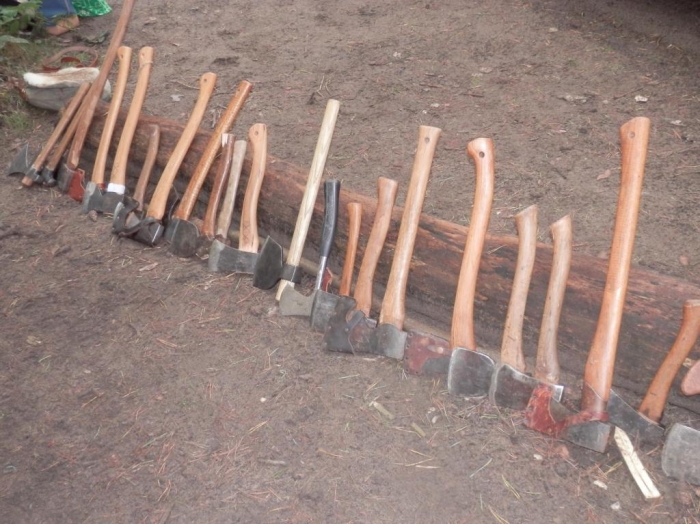
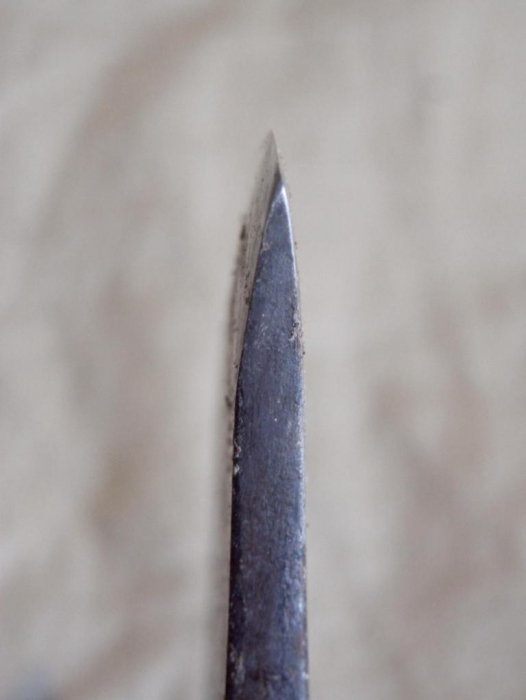
Axes come in an almost unlimited selection of shapes and sizes, but all share the same characteristic – they need to be sharp to function well! Apart from some specialist items, such as carpenters’ axes and carving axes, most axes have edge grinds that differ from knives in that, instead of having flat secondary bevel or hollow grinds, they have a convex grind. The convex grind gives a profile similar to the shape of a church window with the metal tapering in a curve down to the edge. This provides a strong cutting edge ‘supported’ by a lot of metal behind the edge, and it is not prone to chipping or rolling.
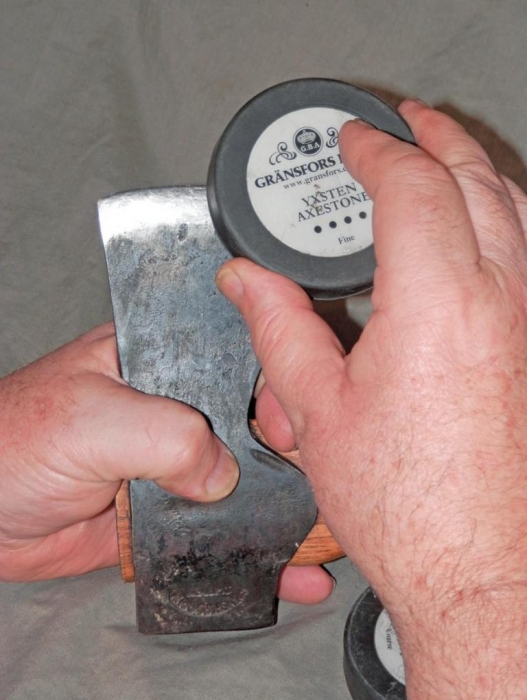
The degree of how fat or slim the convex is depends a lot on what jobs you want the axe to do well; an axe mainly used for splitting wood can be a lot fatter in the grind to help force the wood apart once the edge has cut into the endgrain, while an axe mainly used for fast cutting would require a slimmer profile for ease of edge penetration into the cross grain. A general-purpose axe would need a medium fat profile, as illustrated in my photograph of a Gransfors Bruks small forest axe, probably the general-purpose axe most used by bushcrafters in the UK.
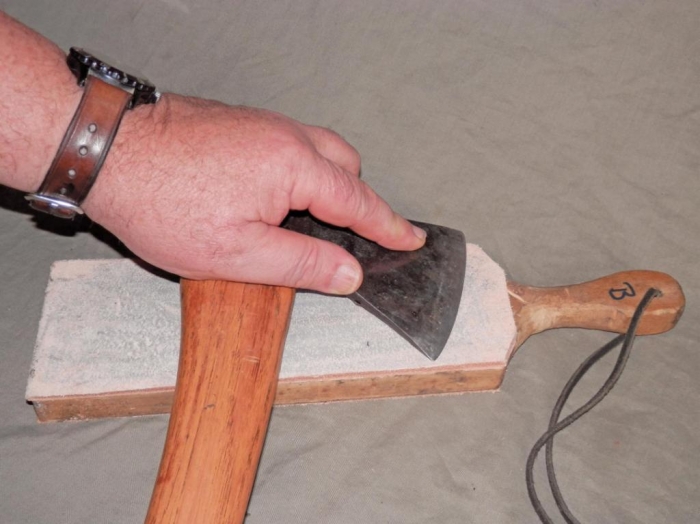
As with knives, the way to sharpen an axe is to remove metal from each side of the edge – always maintaining or respecting the profile of the grind - until the edge is as thin as is possible. To remove the metal, I use pretty much the same tools that I use for sharpening knives. At home, I mainly use a 4-sided diamond bench stone (bought from Aldi for less than £10) and strops made from scrap leather glued onto flat boards. In the field, I mainly use small diamond pocket hones or pocket stones. Diamond stones I either use with water as a lubricant, or use them dry and clean them with a pencil eraser as I go. With strops, I use a variety of commercial pastes, scraping clean the used paste from the leather once it clogs with metal and turns dark.
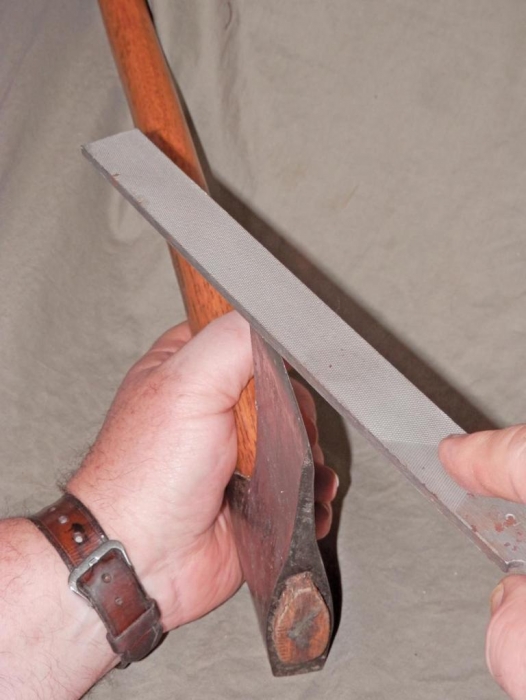
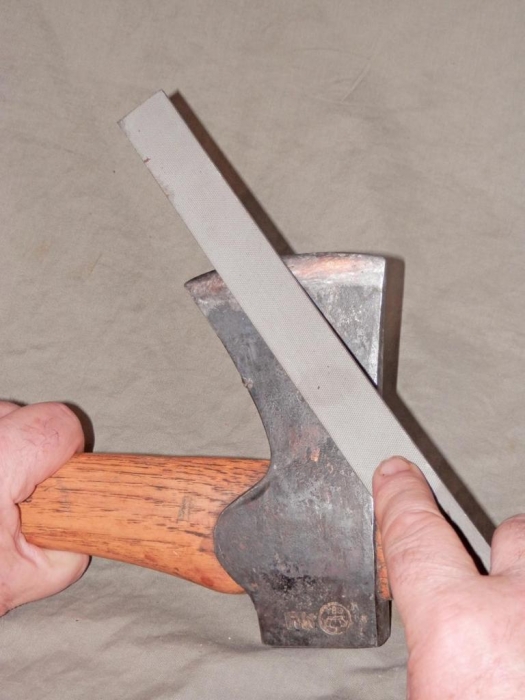
For axe sharpening, I add to my list of tools a dedicated axe stone or ‘puck’ and a couple of files of different grades. The files are there to remove lots of metal in a hurry if the axe blade has suffered a serious ding to the edge; while the ‘puck’ is just a round, two-sided sharpening stone that is a very convenient shape for working on an axe blade. Although the photos show me using the file and stones freehand, I would normally clamp the axe head in a vice for workshop work at home, as it allows the use of both hands on the tool for more control. The puck is an ideal shape for ease of use one-handed in field use.
If the axe’s edge has a severe ding, I will file that flat before I start work from the sides of the edge. Working with the file in line with the edge (being careful not to run fingers along the edge!) and using ‘push’ strokes only, I take the edge down to very close to the bottom of the ding, while trying to maintain the curve of the edge itself. Once the worst of the ding is removed, it is time to work with the files from each side of the edge; an equal number of cuts from each side to keep the edge central.
For safety’s sake, I only cut with the file stroke going away from the axe head, so as not to push my fingers onto the cutting edge. Lift the file off the axe to bring it back to the start of the stroke to avoid breaking off file teeth. I always start my file strokes with the file at an angle to the axe’s edge and ‘sweep’ it the whole length of the edge as I go through each stroke. This will give parallel scratches in the steel of the axe that will show exactly where you have removed steel and help you maintain the convex profile of the grind.
Once you have removed most of the metal with your coarse file, you can go to a finer grade of file and, working from the opposite end of the edge to before, continue filing. This will put the scratches in the opposite direction to the first file cuts, again showing where you have been removing metal and remove the first set of scratches. Once the first cut scratches are all gone, you can move onto using your stones.
I like to use my stones freehand, as I find it helps me follow the convex shape of the grind and whether I am using my 4-sided block, puck, pocket stone or diamond pocket hone, I use a circular action back and forth along the edge, working an equal amount on each side of the edge to keep the edge centralised.
I start with the coarsest stone needed and work down to the finest, making sure that I remove all the scratches from the previous stone before I change grades, and that I am respecting the convex grind. Once I have finished using my finest grade stone or diamond hone I will strop the blade, dragging the edge over the strop for a few strokes each side to give it a final polish.
As with my knives, I test the edge by cutting the corner off a free-handing sheet of newspaper. Your axe should be as sharp as your knife to give best results in any cutting, to help avoid the blade glancing off a cut and, when you make a mistake, to give the cleanest and fastest healing cuts!
As you can see, sharpening a badly dinged axe blade can take hours of work; so, ‘prevention is better than cure’. Here’s some tips:
After every trip where I use any of my axes, I always like to ‘tickle up’ the edge and, for this, I will often use a technique I call ‘aggressive stropping’. For this, I glue various grades of wetand- dry paper to a stiff foam backing, such as old computer mouse mats and strop the axe several times on each grade starting on as coarse a grade as I feel is needed and working down to a fine grade, before giving the edge a final stropping on a leather and paste strop. Having the wet-and-dry paper mounted on the foam allows it to conform to the convex grind, but if the foam is too soft you are in danger of the actual cutting edge being worn down by the abrasive, so be careful if you try this technique!
Whenever I sharpen an axe, I also check not only the head of the axe for any damage, such as cracks to the eye, but also for damage to the handle. Miss-hits can chew up the throat of the handle and even cause the wood to split and, over time, (especially in dry weather) the wedges that ensure the head of the axe will not fly off, can loosen.
Loose wedges need urgent replacement or refitting for safety’s sake and damaged handles need replacing with sound ones, while an application of oil (such as raw linseed) to the handle and wedges will help keep the woodwork in good order.
Keep them sharp, keep them safe!
click on image to enlarge

click on image to enlarge
click on image to enlarge
click on image to enlarge
click on image to enlarge

click on image to enlarge
click on image to enlarge

click on image to enlarge
click on image to enlarge

click on image to enlarge