Pulsar Digex Digital NV Riflescope
-
415
 Comments
- Last updated: 25/04/2021


When Pulsar launched their Thermion thermal riflescopes at the 2019 British Shooting Show, it fuelled hopes that a digital night-vision system in a similar package would soon follow. Sure enough, Pulsar launched the Digex N450/455 4-16x50, an optic that puts all the technology and performance of the boxy Digisight N450/455 into a sleek day scope-style housing.
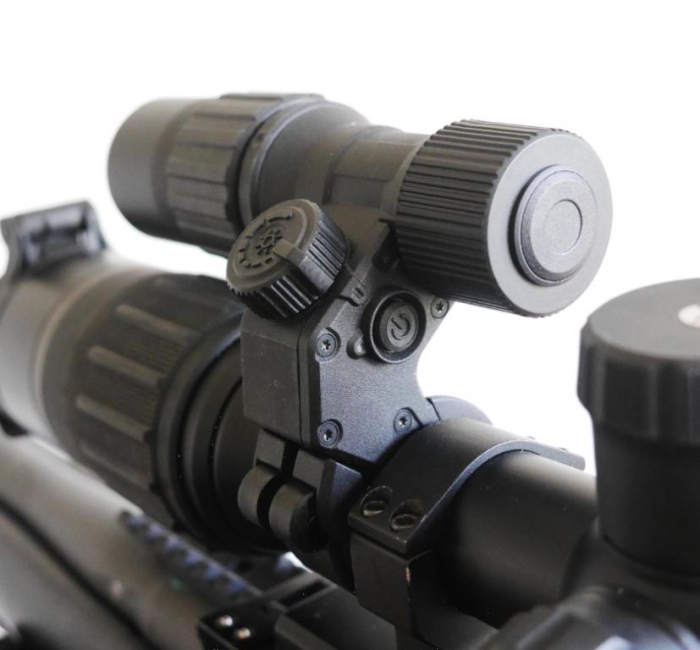
Appearances are deceptive since neither the turrets or the controls on the eye bell do quite what you’d expect. First off, under the twist-off caps of the top and righthand turrets, there are no dials, just a cleverly camouflaged battery housing and USB port. The only turret with a control function is the left-hand one, which replicates the role of the turn-and-click knob featured on previous Pulsar thermal and NV devices: allowing you to navigate and select menu options and giving you fine magnification control.
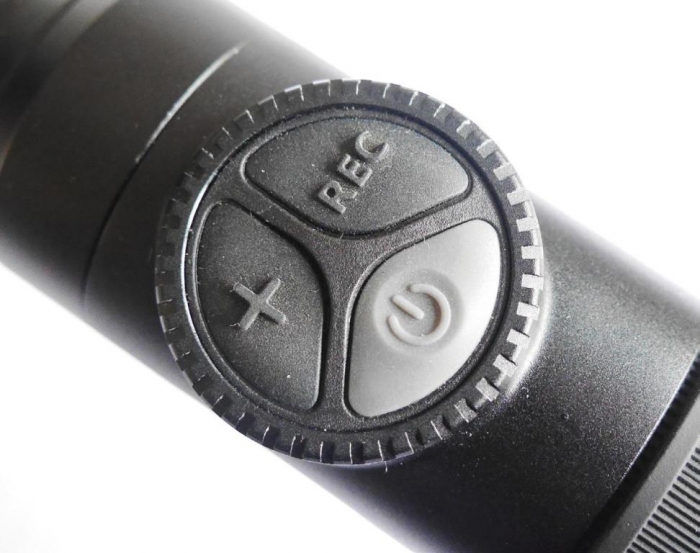
The familiar line of five rubberised quick-access buttons has also been replaced by 3 ‘pie-chart’ buttons on the eye bell. The biggest, and closest to your eye, is the ON/OFF/Standby button.
Forward/right of that is a record button that lets you select stills or video; and start, pause or stop recording to the scope’s built-in 16Gb memory. Forward/left is a magnification button. The first click wakes it up, and each successive click doubles the magnification from 4X to 8X to 16X. A long press activates the picture-inpicture (PiP) view, which combines the wide field-of-view of the 4X image with the magnified precision of 8X or 16X.
A broad, ribbed and rubberised ring around the scope’s long front (objective) bell focuses any target from 5m to infinity and a -3/+5 dioptre ring on the rear (ocular) bell focuses everything on the 1024x768 AMOLED display, including the reticle. Both rings turn smoothly, yet are stiff enough not to be shifted by accidental contact.
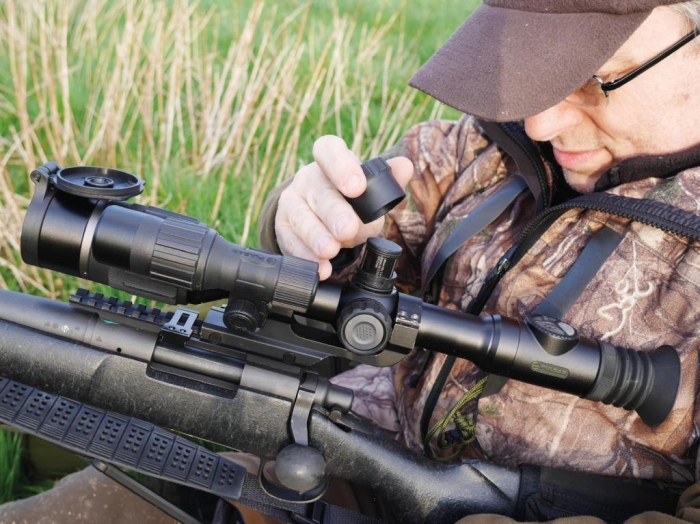
The ocular bell is also equipped with a rubber eye cup that reduces reflection and provides protection against recoil. This is important because thermal/digital scopes have much less eye relief than day scopes. A neat feature of the cup is that it connects magnetically to the ocular bell, making it easy to remove but surprisingly hard to dislodge unintentionally.
Aside from its general good looks, a major advantage of the Thermion/Digex platform is that it has an aluminium alloy 30mm main body tube. This frees the user to select mounts appropriate to their own rifle and budget, plus permits direct mounting to the dovetails on an air rifle or rimfire without the need for a Picatinny adapter.
What is needed, though, is a reachback mount with plenty of offset to make up for the Pulsar’s short (50mm) eyerelief. Distributor Thomas Jacks kindly supplied a one-piece Yukon cantilever mount with 51mm of offset. Even so, I still had to set everything up as far to the rear as possible to achieve the result I wanted on a Remington M700 fitted with a Bell & Carlson stock with a 14” length-of-pull.
With the scope securely and comfortably mounted, I headed out to zero it in. I began by selecting a reticle. There are ten different patterns to choose from, including three scalable (FFP) ballistic designs, but experience has taught me the value of simplicity, so I went for the H50i, which is a simple cross-hair with a small floating cross at the centre. You can also select from eight colour combinations. My favourite is all-orange. You can set the reticle brightness on a scale of 1-10, too. I chose 4 as the best match for the dullish late-afternoon conditions.
To get the reticle colours to display properly, I had to update the sight’s firmware. This is done via Pulsar’s Stream Vision smartphone app. Each device gets its own profile, and the app notifies you whenever updates are released. After downloading an update to your phone, you activate the Wi-Fi in the sight, and the resulting connection initiates the upload and installation process. Even sat in the middle of a field, this took just 3 minutes from start to finish. As well as providing updates, the app lets you download, manage, view, play and share 1024x768 JPEGs and MP4s. It even enables you to view and control the sight remotely.
To begin the zeroing process, I set up a large, clean backer at 25m, with a 3” Birchwood Casey Shoot-N-See roundel stuck in the middle. I’ve learned the hard way not to start too far out. Next, I used the left-hand ‘control turret’ to select one of the five zeroing profiles available (A-E) and create a primary zero point at 25m. Finally, I checked the lens cover was closed so as not to overexpose the sensor, used the control turret to optimise the brightness and contrast of the image, focussed the objective lens to sharpen up the target, and sent the first round downrange.
The point of impact (POI) was visible through the sight, a bit right and high. No problem. I opened the zeroing menu, zoomed the target image to 16X, and selected the horizontal (X) adjustment. By dialling the turret, I scrolled the red diagonal cross that appears in zeroing mode to the right until it was directly under the bullet hole when the reticle was centred on the target. Then I selected the vertical (Y) adjustment and did the same. Once I had the reticle centred on the target and the diagonal cross centred on the hole, I pressed the turret button twice to set the new zero. A subsequent confirmatory shot scored an almost perfect bullseye!
Zooming to 16X provides the finest click values (under 0.1 MOA) and the best chance of seeing the bullet hole through the sight. You can also zero using a ‘freeze’ function that takes a snapshot of the reticle and target, relieving you of the need to keep the rifle aligned as you zero. I find the ‘live’ method more precise, and the ‘freeze’ method more convenient as you don’t need to aim the rifle while making corrections.
I repeated the zeroing process at 50m and 100m, giving me three separate, selectable zero points for a total of just six rounds. Ten zero points can be created for each profile. Each has a set of numerical coordinates, so by pre-entering the previous set you can minimise the adjustment needed to create successive points. The menu also lets you select a default zero point for each weapon profile. The active profile and zero point are conveniently displayed in the data bar below the target image and can be quickly changed via the control turret.
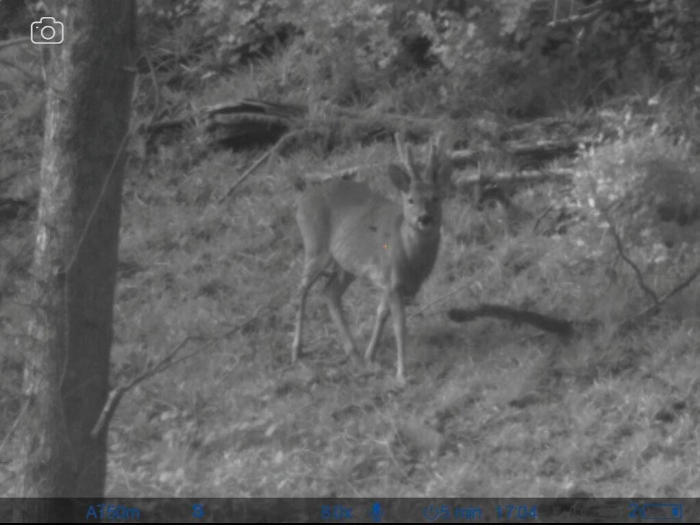
By the time I had finished zeroing, the sun was setting, so I headed for a favourite stand in the hope of a fox. After a short wait, I spotted one at 600m in the thermal and was quickly able to reacquire it in the Digex. The IR illuminator supplied with the scope gave a broad, even beam and good eye-shine at 400m, and from 250m in, the definition was excellent.
The Digex N450 model has a longerrange 850nm illuminator, and the N455 model a covert 940nm one. Its features include an integral QD bracket, a rubberised ON/OFF button accompanied by a green pinhole LED, and a knob that lets you dial the intensity up or down. There’s also a pivoting head with a locking ring so you can centre the illuminator’s beam securely in the scope’s field-of-view. Unfortunately, however, there’s no way to focus it.
The problem with a broad beam is that it tends to pick up close-range terrain and vegetation, producing a strong reflection that dazzles the CMOS sensor and causes the scope’s Sumlight image-optimising software to recalibrate the image. This removes the flare, but blacks out everything else, actually making distant objects harder to see! Turning off Sumlight improves things, but the Digex’s full potential can only be realised by replacing the standard illuminator with a focusable alternative, complete with mount.
Another plus for the supplied illuminator is that it uses the same APS2 rechargeable Li-ion battery as the Digex. The charger can hold both cells, but you can also charge the scope’s battery in situ –along with the higher-capacity built-in APS3 cell- via the USB port under the right-hand turret cap. Run time is about four hours from the APS3 and three from the APS2.
Overall, there are plenty of positives and just a couple of negatives. The Digex scores highly on its looks, layout and controls, power supply and consumption, high-definition display and high-quality downrange image, especially in twilight conditions and with the right illuminator. Nevertheless, I would like to be able to make the display icons much dimmer and even switch them off. Most of all, I would like Pulsar to give their otherwise excellent X850/X940 illuminator a focusable beam.

click on image to enlarge
click on image to enlarge

click on image to enlarge
click on image to enlarge
click on image to enlarge
click on image to enlarge
click on image to enlarge

click on image to enlarge