Handloading Part 11
- By Wheelwrite
-
0
 Comments
- Last updated: 15/12/2016


Many of us will have experienced the frustration of that wayward shot fired from a batch of our best reloads; did I pull it, was there something wrong with the round, did the wind change? The truth is, we’ll probably never know. However, one possible explanation may have been your approach to consistency and quality control. This is not about accurising our ammo, but simply about reducing the production variables to as near zero as possible.
It’s Just a Rubber Ring
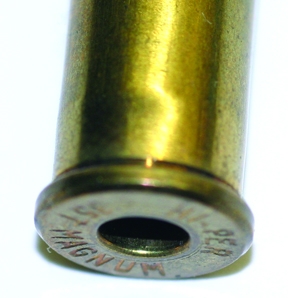
The fit of our standard ?” x 14 TPI dies in the press can best be described as sloppy. Couple this with the fact that many locking rings are so thin that they have less than three turns of thread and we have an instant problem. Tighten the grub screw on the locking ring and turn the die tight in the press and the chances are that it might be canted to one side. This means that it is not actually aligned with the centre of the ram and shell holder. The result is that when the case is processed - sized, neck expanded, bullet seating and crimping, it is actually trying to move the case sideways in the shell holder and so misaligning the finished article. In extreme examples of full length resizing a ‘step’ can be created across the web of the case, which is not good!
I’ll take credit for coming to the same conclusion as Richard Lee of Lee reloading fame, except that his solution was more elegant than mine. He incorporated a rubber ‘O’ ring in the locking ring, allowing it to float against the press body and permit the die to ‘self-centre’ around the case as it was cycled. He also used a slightly under-size ring that offered resistance against the thread. My solution was to simply place an ‘O’ ring under the standard locking ring, achieving more or less the same effect. The only downside is that one has to adjust the die position each time that it is refitted.
Batches of Everything
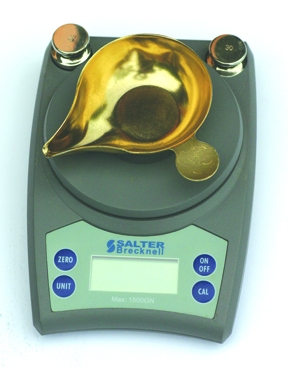
We’ve already discussed the need to keep cases in batches of the same brand and service history well, let’s go a bit further. Prep them in the usual way; trim to length and de-burr. Now weigh them and batch them according to weight in quantities that reflect your usage. This is best accomplished by charting the whole range of weights, rejecting runts and fatties and dividing the rest into batch sizes that meet your needs. Let’s now turn our attention to the bullets.
Again we weigh every one, rejecting the extremes and dividing the rest into batches. This gives you a good chance to visually inspect every single one – damaged and deformed examples are more common than you may expect. If you’re hunting then the tip will be of interest as well as the base. Make sure you are using the correct bullet seating probe as this should be more tolerant of slight changes in the ogive profile… a common consequence of the maker using more than one set of swaging dies.
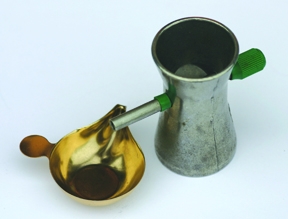
Check the batch number of your selected propellant – when you buy the next tub, chrono a few test rounds before going into production – you may well have to adjust the size of the charge. When throwing the charge, set the powder measure to around 1/10th grain under your desired weight and trickle each charge into the weighing scale pan. Remember to lightly tap the scale bar before accepting the indicated figure on a mechanical scale – especially for charges of under 10-grains. With practice you should be able to ‘eyeball’ better than half of a tenth of a grain.
Rolling Around
Does the seated bullet point exactly down the bore? The improved alignment of the die should help but may not solve all the issues. If you’re using a roll or taper crimp on the bullet, make the seating operation a two-stage event. Back off the crimp part of the die and seat the bullet to the desired depth. Complete the batch, back off the seating probe and carry out the crimp as a separate operation. Now select a few rounds and roll them on the bench… if the tips move up and down then we still have a seating issue.
The cause can be the use of an incorrect seating probe, or the effects of misalignment in the die. One method that can help is to gently cycle the press until the probe just engages the bullet, then take the pressure off the press handle and pull again to complete the seating cycle. This is particularly beneficial where the bullet has a round ogive as any misalignment of the initial positioning in the neck may be adopted by the probe. In some instances the problem is caused by residual soiling in the case neck. For the dedicated perfectionist a number of commercial alignment tools are available. It is also suggested that you seat half way, drop the ram, rotate the case/bullet 180° then finish the job, in this way you are in theory halving any run out.
Prime Importance
As we discussed in an earlier article, all primers are not born the same. If you worked up your favourite load with a given brand and type, test fire a few examples with any alternative version before committing to the change. And finally, keep records, copious amounts of not just the assembly, but the shooting conditions and the results achieved. Remember, if you have to change your selected design, endeavour to change only one variable at a time, measuring and comparing the results as you go.

click on image to enlarge
click on image to enlarge

click on image to enlarge

click on image to enlarge

click on image to enlarge

click on image to enlarge
click on image to enlarge

click on image to enlarge

click on image to enlarge
click on image to enlarge

click on image to enlarge

click on image to enlarge

click on image to enlarge


