Nite Site
- Last updated: 15/12/2016


Not long ago, digital night vision (NV) looked set to revolutionise our nocturnal hunting abilities, and to an extent this has happened. The first add-on units from now-defunct GB Sights being superseded by NV giant Yukon and its best-selling Pulsar Digisight N550. However, enterprising shooters have been taking advantage of the night-vision capabilities of certain models of home and surveillance video cameras widely and cheaply available to build NV add-on systems of their own at a fraction of the cost. It was only a matter of time before someone stepped up to the plate with an off-the-shelf version, and that’s precisely what Nite Site founders, brothers Dave and Phil Craven, have done with their NS50 and NS200 units.
Front and Back
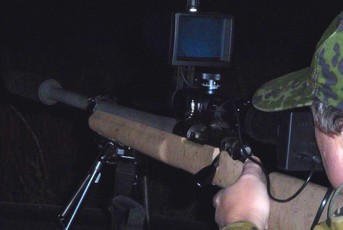
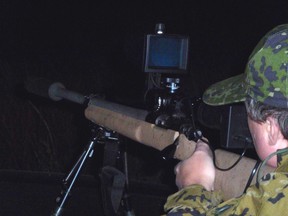
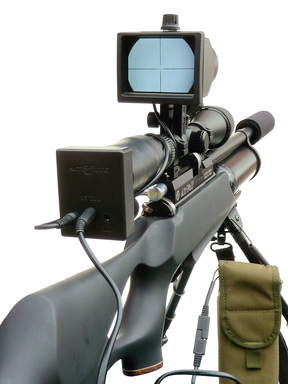
Both show the same essential configuration: a conventional 12V lamping battery powers a camera module mounted to the eye-bell of a regular riflescope. Also a secondary module, mounted to the scope’s body tube that contains both a rearward-facing monitor and a forward-facing illuminator. The difference is in the camera, which is fifty-times more sensitive in the NS200, and also switches automatically to colour output in daylight.
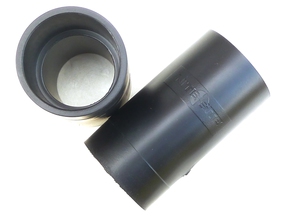
The camera fits to the eye bell via a choice of two, thick, rubberised connector tubes with different internal diameters at one end, a simple push fit being all that’s required to keep everything together. Plus if things don’t line up perfectly, or get nudged out of line in use, it only takes a second to put them right. It’s not perfect, as it isn’t compatible with illuminated-reticule scopes that have the rheostat mounted on the eye bell. It also doesn’t allow you to adjust the position of the camera to match individual eye-relief, which can limit the field of view (FoV) that is already cropped in one dimension by the rectangular shape of the monitor screen. On the other hand, the remaining FoV is still wider than with most dedicated NV rifle sights.
1” or 30mm
You also get a choice of mounts for the secondary module to fit both 1” and 30mm main tubes with a dedicated QD clamp. Plastic, it clips around the tube and then tightens via a bolt and nut with the module fitting to it by a T-shaped lug. Despite their light weight, they seem pretty sturdy, and do a good job in securing the module without marking the scope tube.
Setting up could hardly be easier, though I did initially have a problem focussing the camera, which wouldn’t budge and is too deeply recessed below the mounting ring to grip with your fingers. A gently tweak with a pair of electrician’s pliers loosened it up, after that just light finger pressure required. Nite Site are now addressing this before sending them out, problem solved!
As for the secondary module, you can mount it at 12 o’clock, which is the easiest position for scanning, or at 3 or 9 o’clock (depending on whether you’re left-or right-handed), which allows you to adopt a firmer firing position. This was my preferred set-up with centrefire rifles, but I was perfectly happy shooting airguns and rimfires with it on top!
Take Control
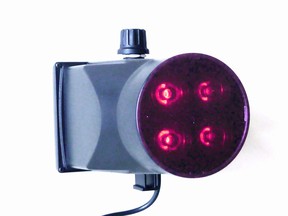
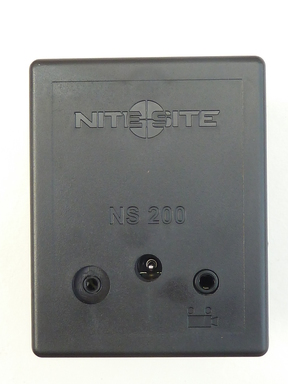
There’s only one control - a large, 5-position, knob on top of the screen unit, which lets you dial through the options. The first click turns the monitor on, and the next four turn up the illumination. This comes from four LEDs which give a maximum working range of around 130-140m.You can see a bit further than this, but not well enough in my opinion to positively identify or take precise aim at your quarry.
I’d like to see an OFF position between each of the illuminator settings, or at least between the top two, which I used most. Along with a dimmer for the monitor, which is bright even with the IR off, and excessively so at full power, with adverse consequences for your natural night vision.
I ought to mention the cable connections. These were promptly upgraded when a fault emerged with the originals, but I still had some issues with an intermittent signal and I’m not sure the sockets or jacks in the test unit are really rugged enough to stand the kind of wear-and-tear they’re likely to get in the field. I didn’t much like the stepped connector between the battery and primary power cable, either, which looks like a Deben fitting yet is dimensionally incompatible with their cables. The result - I couldn’t connect my vehicle adaptor – an accessory Nite Site don’t supply. OK it doesn’t use much power and a fully-charged battery will last all night. But we’ve all inadvertently gone out lamping with under-charged batteries and being able to recharge from a vehicle’s socket can save the day.
Speaking to Phil confirmed that they’d already taken these criticisms on board, replacing the stepped connector with a concentric one that’s neater and works better, and sourcing some sturdier, right-angled jacks for the power cables. Still no vehicle adapter, but at least you can now get one to fit the new connector from Maplin’s, etc.
Performance
But if the laudable simplicity of the NS200’s build sometime gives rise to weaknesses, it’s hard to fault its performance. The image on the monitor is large, clear, and bright, and (with the correct focus on the camera’s lens) the scope’s reticle shows up crisply. What’s more, unlike conventional NV add-ons, you can use an illuminated reticle with the NS200 because there’s no photocathode tube to burn out. The brightness of the image also means you can make use of a greater range of magnification than is available with many NV set-ups: x8 being entirely workable with most scopes, and even higher magnifications with top-quality glass.
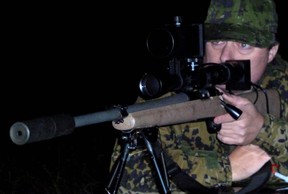
When it comes to taking a shot, you probably need a couple of outings to get used to aiming via the screen, muscle memory being what it is, the difference being particularly noticeable when shooting off-hand. Off a rest however; bipod, sticks or bag etc it’s really no more difficult to put the shot where you want it than when using a regular riflescope! Easier perhaps, since you don’t have to worry about head alignment or eye relief, just controlling the trigger and managing recoil where necessary.
Finally, the NS200 is equipped with a jack socket marked with a cine-camera icon that allows you to connect a digital recorder. Recording your outings can obviously be a source of entertainment afterwards, but it can also be very helpful for reference when trying to relocate shot quarry after clearing a field, or even to evaluate the likely effect of a shot on a fox that’s run off. It can be very re-assuring to see the strike again and know it was well hit and can’t have got far.
In conclusion, then, the NS200 isn’t perfect, but it’s easy to use, doesn’t mess with your daytime set-up, and outperforms many conventional, and even some digital, NV systems costing a good deal more. Plus whilst DIY camera systems may offer many of the same benefits at lower cost, buying an NS200 represents an instant all-in-one solution that also comes with service support and a 12-month warranty. All in all, it’s a unique and ground-breaking product, and one that ought to provoke some interesting responses from other players in the NV game.
Specifications:
Colour (NS200) or B/W (NS50) camera module
LCD screen & IR illuminator module
3.3A battery with bag and charger
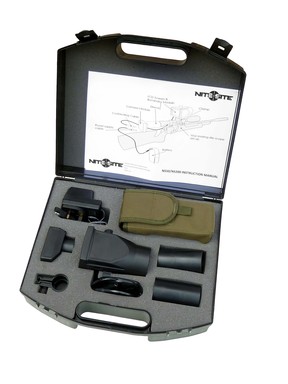
Carry case
12 month warranty
Weight 19.4oz (on gun)
All cables and adaptor included
Prices £599 (NS200) or £399 (NS50)
FOR - A cost effective and unusual approach to NV shooting
AGAINST - You need to get used to looking at a screen rather than down a scope
VERDICT - It works and can only get better
click on image to enlarge
click on image to enlarge
click on image to enlarge
click on image to enlarge
click on image to enlarge
click on image to enlarge

click on image to enlarge
click on image to enlarge
click on image to enlarge


