Aimpoint Micro S1 Red Dot Shotgun Sight - Eye opener!
-
0
 Comments
- Last updated: 18/03/2024


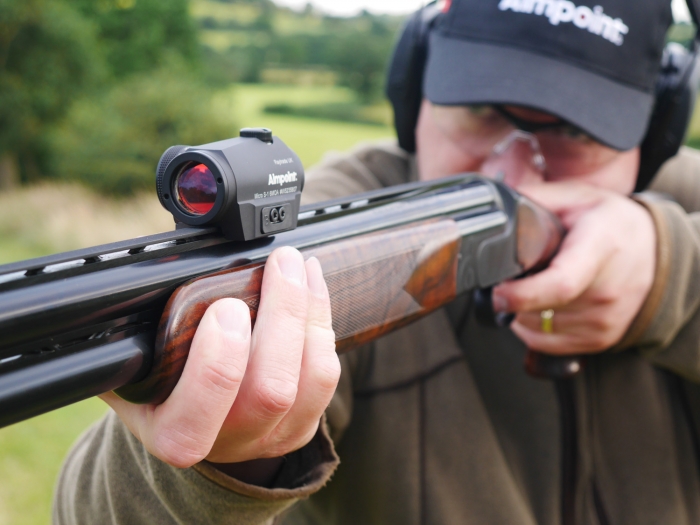
Last May I reported on my experience trying out Aimpoint’s unique Micro S1 shotgun red dot sight on clays at the Barbury Shooting Ground. To recap, the S1’s positive sight picture, combined with some great coaching and a versatile gun –The Yildiz Pro Black Adjustable-, quickly had me breaking clays at a level well above my expectations. Nevertheless, because 95% of my shotgunning targets are winged quarry, I couldn’t wait to give the S1 a proper field test. So, if you’d like to know how that went, read on!
A quick note
First, however, I must note that, like my Barbury visit, this review was made possible by Raytrade, who were UK distributors for both Aimpoint and Yildiz at the time; and that, whilst Raytrade still represents Yildiz, the Aimpoint account has since passed to Edgar Brothers. Massive thanks to Raytrade, too, for an exceptionally generous loan period that really let me put the kit through its paces and build the skills that both improved my kill ratio and put more birds in the bag.
Initial testing was carried out with the same Yildiz/S1 combination I had used at Barbury. This was good news because the Pro Black’s adjustable comb is the ideal complement to the higher sightline presented by the S1, as compared to a standard shotgun rib. An adjustable comb isn’t essential when using the S1, but the pairing worked so well that when –spoiler alert- I decided to buy the S1 at the end of the test, I was sorely tempted to add the Yildiz to the bill as well!
Getting out there
Decoying accounts for the lion’s share of my corvid control. Before trying the Micro S1 in this role, I set a baseline with a couple of ‘bare-backed’ bead-only sessions. Tackling the local crow/jackdaw mix calls for constant reassessments of range and speed, but the Yildiz rose to the challenge as to the manner born, taking 25 in the first 30 shots. The steadiness of the long-barrelled, steel-actioned Yildiz was expected, but its agility came as a pleasant surprise. After a second session went even better, I decided to mount up the Aimpoint and see what changed.
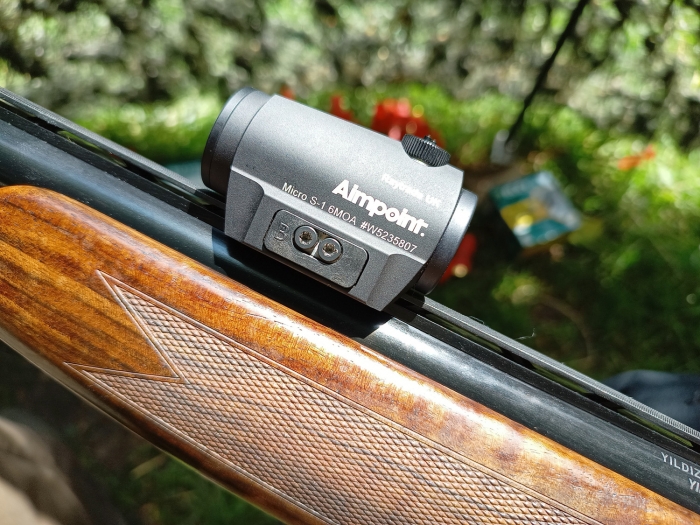
Step #1 is choosing where on the rib to put it. At first sight, the choice seems to be between seeing more through the ‘window’ vs. more of the sky, but it’s really about finding where the dot is quickest to acquire. My experience using the S1 on clays suggested I did best with it positioned near the tip of the forend, so I started there.
The next step is to select the appropriate components for the mounting clamp. This entails measuring the rib at the mounting point and matching the resulting numbers to the key on the supplied diagram. Attachment is via small Allen-headed screws and a couple of tiny double washers, so do the job somewhere anything dropped can be easily found! To keep the S1 secure, but without over-straining either the clamp or the rib, Aimpoint recommend applying 1Nm of torque.
Zeroing
The S1 is zeroable, and it’s worth doing this properly. Getting it spot-on will give you some great kills at surprising distances, whereas ‘good enough’ risks drilling some serious holes in your self-confidence. Zeroing is based on bore-sighting and can be made more precise by inserting a fired cartridge with the primer removed in each chamber to obtain a smaller aperture. The reference target should be placed at the distance at which the gun is regulated (i.e., where the barrels converge), which is usually about 35m. The S1 is non-magnifying, so choose a target with a centre that is easily visible to the naked eye. Once the gun is aligned with the target, it must not move again until zeroing is completed. The next step is to adjust the turrets to centre the dot on the target. To finish, confirm your zero with a shot or two, and you’re done!
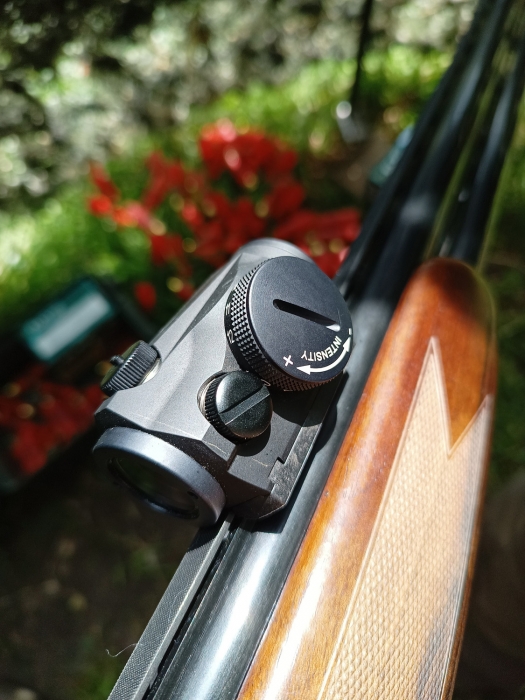
If you need to adjust the POI but don’t have the supplied tool to hand, never fear as clever design means you can use one of the turret caps instead. Simply unscrew it, flip it over, and the two pegs on top will lock into two matching holes in the top of the adjusters, while the ribbing on the edges provides grip, and a sticker inside the cap tells you to turn anticlockwise for Right/Up.
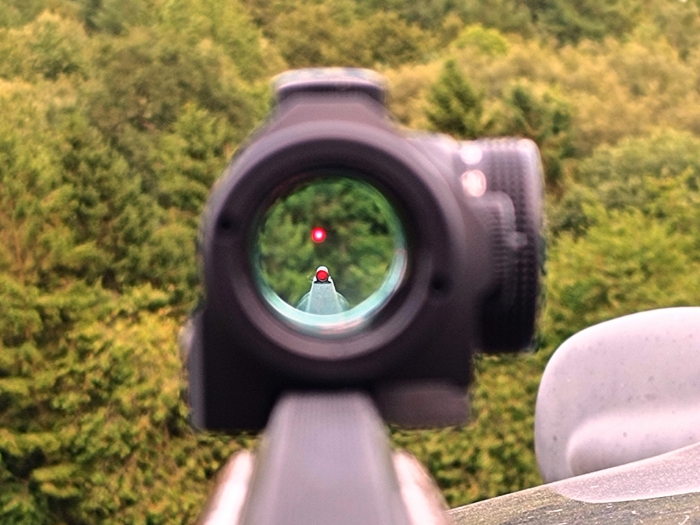
Actual click-values (0.5 MOA) don’t really matter here. More important is the generous overall travel of 20m @ 100m that ensures you can zero the sight whatever the pitch of the rib. The S1 is parallax-free, too, so, once zeroed, the shot will go where the dot is, regardless of head position. That said, the instinct to centre the dot in the window encourages a consistent gun mount, which is never a bad thing.
On target
When shooting clays with the Micro S1/Yildiz combination, I learned that (1) the red dot makes finding and maintaining the ideal line to the target intuitive; and (2) working out the appropriate lead comes with practice. The key to this lies in the fact that the S1’s housing gives you a definite visual reference, so lead ceases to be an impression, an estimate, or a guess, and begins to be perceived as fractions or multiples of the sight’s diameter. Consequently, once you make that killing shot, the corresponding sight picture is easier to remember, to visualise, and to repeat. So, you increasingly miss less and kill better.
In the field, this meant that the more I shot at the straight-flying crows, the more I felt able to push the range, and the further from the hide the birds began to drop. Crossers were as good as dead as soon as I saw them, and connecting with going-away birds (usually my bugbear) was almost like picking them off with a rifle.
The jackdaws were harder. Agile, small, and tending to arrive from behind in tight packs, they required speed as well as precision. After some frustration struggling to find the dot fast enough and to track them with it as they wheeled over the decoys, I realised that wasn’t the way to do things. Instead, you have to pick your bird, mount the gun on it before you look for the dot, register the dot for an instant, look for the kill point on the bird, and let your reflexes do the rest. This takes a little practice but is essentially the same as learning to ignore a traditional bead. You are simply delegating to your unconscious mind the things it does best and freeing your conscious mind to do the strategizing!
Initially, pretending the S1 wasn’t there and reverting to my old shooting style felt like I was cheating the test. But then it struck me that, instead of bypassing the S1, I was actually internalising its presence. Paradoxically, the more I shot with it, the more I felt I wasn’t, and the more I liked it!
As the decoying session progressed, I quickly matched my ‘bare-backed’ kill ratio, and by the end, I was fractionally ahead. That seemed a bit anticlimactic, until I started picking up, and realised how many of the birds were beyond my usual range limits, and what that said about the S1’s contribution to accuracy.
As noted above, achieving cartridges-to-kills parity with the S1 on the jackdaws took a shift of approach. At the same time, I reconsidered the position of the sight on the rib, ultimately moving it about 15cm closer to the muzzle. With the comb and zero adjusted to match, I found this helped me forget about searching for the dot, and simply get up, on, and into the bird. I wasn’t working hard anymore. I was just doing it.
A different gun
That’s not the end of it, though, because when the Yildiz went back, I switched the S1 to my Hushpowered .410 Mossberg. This handy little gun has always been hard to shoot consistently, as the height of the bead on the moderator makes it shoot very low. The adjustability of the red dot totally fixes that. Moreover, now I’m used to using the S1, the comb height seems less crucial. Best of all, the extra precision and consistency provided by the sight have increased my ability to make solid kills at greater ranges. The result is that the Mossberg is now a very potent tool and one that lets me take on the corvids effectively in parts of the farm where the power and noise of a 12-gauge would be unwelcome.
Conclusion
Overall, the Aimpoint Micro S1 certainly isn’t cheap (some great deals are available) and does take a little getting used to. However, the outlay in cash and time quickly pays off by way of confidence and results. Whatever you use it on, from a big O/U 12-gauge, to a little Hushpowered .410, and from clays to corvids, I reckon it has the potential to take you to a level beyond your expectations.
click on image to enlarge

click on image to enlarge

click on image to enlarge

click on image to enlarge
click on image to enlarge

click on image to enlarge
click on image to enlarge

click on image to enlarge
click on image to enlarge