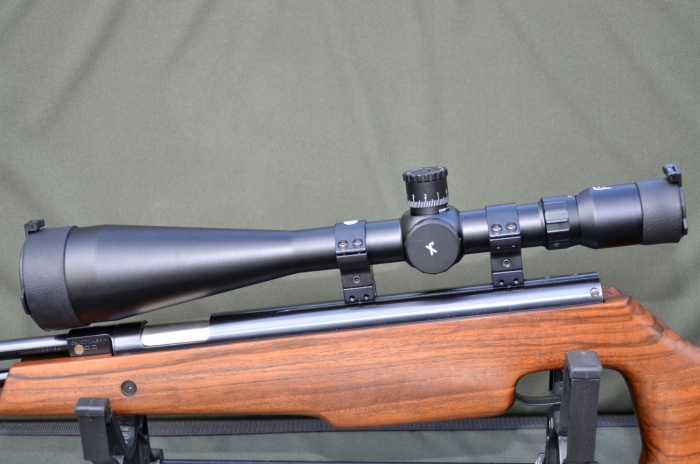
Falcon X50 10-50X60 Riflescope
-
0
 Comments
- Last updated: 08/03/2024


Field Target shooting is unique in outdoor competition, in that it allows the competitor to make use of range-finding scopes, and these optical tools are now a pre-requisite to success. Ultra-high magnification is utilised to exploit depth of field, and the competitor adjusts the parallax dial until the target comes into sharp clarity. At that moment, the distance is read off the dial, and a pre-determined aim point for that distance can be used.
Winning combo?
Various scopes are available that could be utilised for Field Target (FT), but for serious performance the shortlist of models from which to choose dramatically reduces. FT scopes start at around the £400 mark for something like a KonusPro M30 12.5-50x56, which can be a great starter model, but once we bear in mind that you can then go right up to a March 80x scope and spend in excess of £3,000, it becomes clear that making the right decision can be daunting.
It’s always an interesting exercise to look to see what the competition winners are using, and several top FT exponents, such as James Osborne, regularly earn their place on the rostrum by using a Falcon scope. Falcon’s T50 model was popular, but the new X50 has generated plenty of interest on the FT competition circuit and is now a regular sight.
On test here is the Falcon X50 10-50X60, and it makes sense to first decode the basics - this model offers variable magnification from 10x through to 50x, and the ‘60’ in the name refers to the objective lens size in mm.
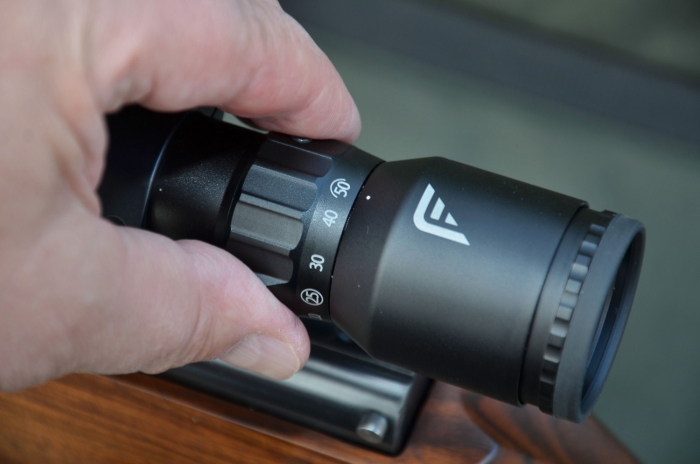
Front or side?
Whereas the trend for parallax adjustment used to be for AO (Adjustable Objective), in other words, a range dial up front, all the latest FT scopes come with side focus, where the left side turret acts as the adjuster dial. There is also a trend, born out of practical advantage, for a side wheel too, since this helps to magnify the difference in the range markings on the dial by extending the arc of movement. Results are easier to interpret and therefore more accurate with a side wheel fitted, so I requested this for the duration of my test since the X50 doesn’t come with one as standard.
Falcon confirmed that shooters now regularly request quality custom wheels, so these are available as an optional extra. I was sent the Garima Magnetic Wheel Kit with Turret Cap (160mm/6.25”), and this retails for £199, but I believe that a custom special by Jon Harris can also be ordered.
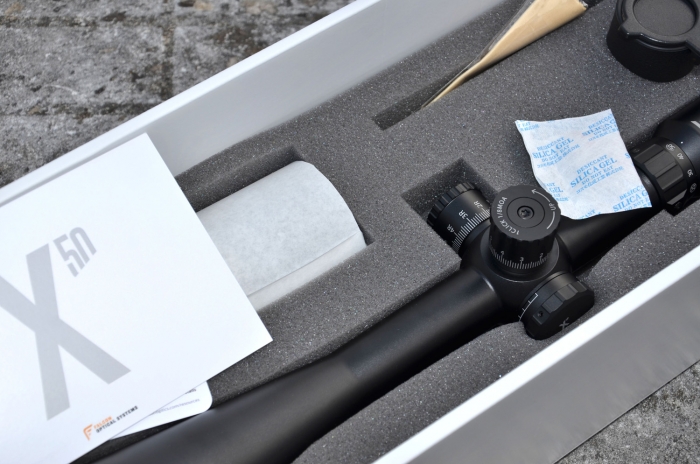
Packaging and spec
The X50 itself comes nicely protected in a padded box, and alongside the scope, we get a 3” sunshade, flip-up push-fit lens caps, and a cleaning cloth. These Japanese-built Second Focal Plane (SFP) scopes have a one-piece tube construction, and whilst my test model came in matte black, it is also available in a practical Cerakote silver finish, which should in theory be less susceptible to extreme heat.
Basic set-up
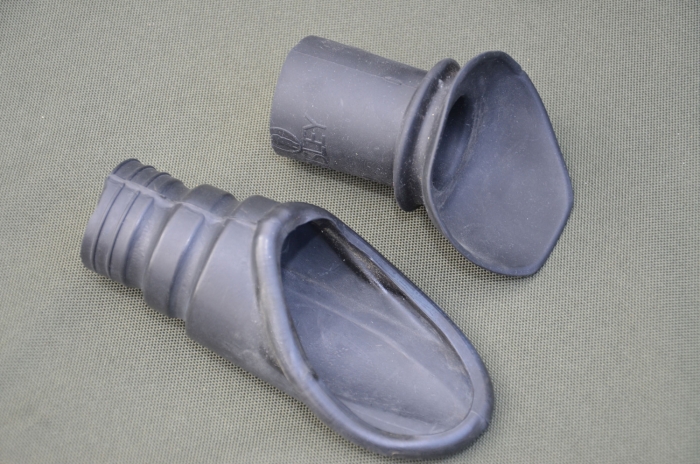
Given the large objective bell, we need high mounts here. I chose to fit the sunshade in place, and this is super-easy, you just need to remove the push-fit lens cap, allowing the shade to be screwed into place, and then the cap can be re-applied. As usual, at the start of set-up, use the rear ocular dioptre to quickly adjust the reticle into focus if necessary. At this juncture, I should point out that it is imperative that a rubber shroud/lens enhancer is used with this style of ultra-high mag FT scope. High mag invariably means not having such a bright picture, and when backlight gets into the scope, the crispness of the image is also compromised. The rubber lens shroud/scope enhancer helps to eliminate the backlight, and much more control and refinement of the image is restored.
Where zeroing is concerned, some FT shooters prefer to ‘centre’ the scope by dialling each turret to the central point of their adjustment, then using adjustable mounts to get the zero as near as possible, just using the turrets for the final tweak. This minimises any stress on the scope’s internals and also ensures that we look through the best part of the lens. Either way, on test, the X50 had plenty of adjustment.
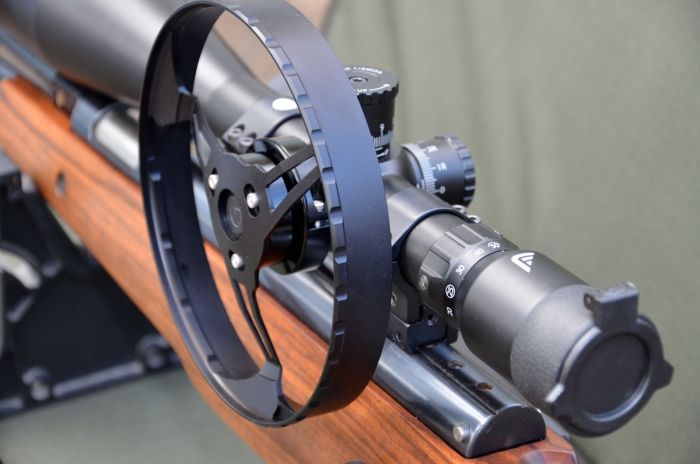
Side wheel/parallax set-up
The next piece of preparation is to fix the Garima Side Wheel in place, and this design features a split locking cup. To fit it, slightly slacken the two grub screws, then sit the side wheel into position over the parallax dial on the left side. Now, gently nip up the two silver grub screws to lock the wheel in place. The wheel deliberately comes with no markings, to allow the shooter to set it all up to their eyes/personal requirements.
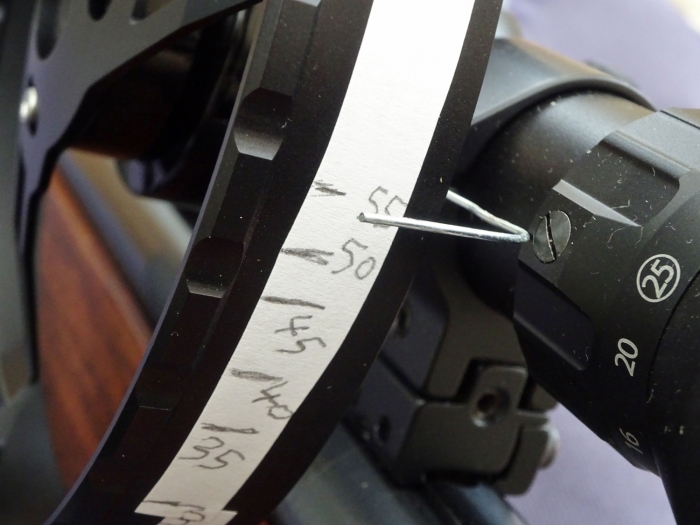
We now need to add some white tape around the circumference of the wheel, to allow us to add range markings. Before we start, we also need to set up a pointer from the scope body, so that any reading is precise and obvious. There are a few available as add-on accessories on the market, but for my test, I locked a small tongue of wire between the split mount body, which worked perfectly.
The next stage is best carried out at the range, and you don’t even need to fire a shot. What we need is to view targets or target boards at each distance, knowing that the distance is measured and correct. Viewing on high or maximum magnification should make the process more accurate, and the best method is to dial down to the minimum distance, then slowly use the wheel to twist through, until the target comes into crisp focus, gently twisting past the clear point and back, just for confirmation. A consistent approach is key here. At the correct point, mark the range, first in pencil (in case it needs altering) on the white tape, and repeat the process for every target distance.
My first session with the X50 couldn’t really have gone any better, and with every distance marked off, it was then reassuring to pick targets at random and see if they dialled correctly. The side wheel via the X50’s left dial was super-smooth in operation, and it all felt very refined.
Be aware that eyes can get tired, and different lighting and conditions can slightly alter results, so check and make fine adjustments over a few sessions, and when all seems reliable and repeatable, neatly add in the distances on the wheel in a more permanent fashion.
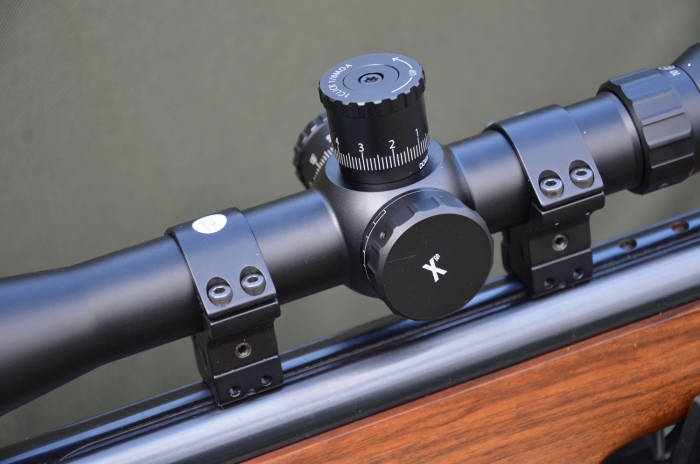
Turret markings/distance set-up
Okay, so we now have our parallax wheel set and marked up. Now we need to arrive at a chosen zero and mark off the adjustments on the elevation turret for each distance. Where Field Target is concerned, a normal zero isn’t really the emphasis, as we need to have a predetermined aim point for each target distance, normally clocked at five-yard intervals. In other words, set up and adjust for the chosen zero, but then at every distance from nine yards through to 55 yards, make a note of each adjustment required on a crib sheet/card, or add tape to the elevation turret itself for each distance. At the end, we should have all the ranges marked on the turret, or a crib card stating 10 yards = 5 clicks up, 35 yards = zero, 20 yards = 4 clicks down, etc.
The optional side wheel kit, as mentioned, includes a custom oversized replacement elevation turret, and some competitors will prefer to use this, and mark up the perimeter, again, with neatly applied tape. Target turret clicks are 1/8 MOA and very positive and audible. The reticle is the MOA200 design, and whilst this is fairly conventional, it is very precise and refreshingly uncluttered.
Verdict
For those who have never experienced shooting with high magnification, optics such as the Falcon X50 can come as a shock, although many shooters tend to parallax/range-find targets viewing on 50x, and then dial to a lower mag to take the shot. This is where personal preference comes in, and whilst high mag may emphasise wobble, that error can then be easier to deal with.
As for clarity overall, the X50 doesn’t disappoint. High mag loses brightness compared to a lower specification, and a much-reduced field of view can also be tricky to deal with, especially under the time restraints of FT, just trying to find the target. Yet the name of the game is practice and familiarity, and once a consistent approach is arrived at, there’s no doubting the pedigree and performance on offer from this highly respected optics brand.