L.E. Wilson Reloading Gauges
-
0
 Comments
- Last updated: 20/06/2023

Back in 1927, Sam Wilson, a successful competition shooter, started making his own tools and gauges because he could not locate the ones he required for his reloading needs. This activity evolved into the L. E. Wilson company, and they have been manufacturing precision tools and gauges ever since. Today, they use the most up-to-date CNC machinery to manufacture equipment for reloaders. They work to tolerances that enable shooters to develop their ammunition to the very highest specifications.
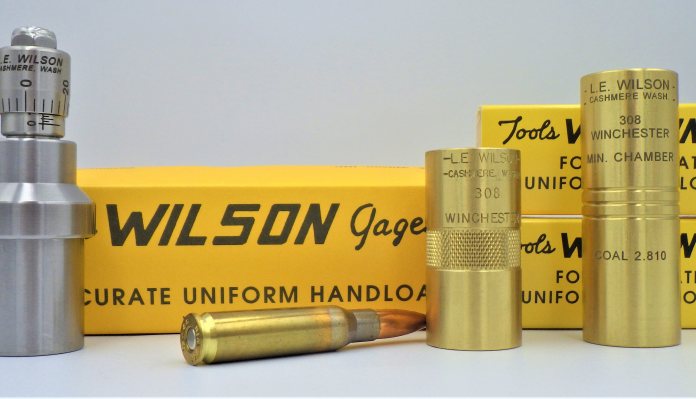
This one-piece, non-adjustable tool is used to check fired and resized cases for head-to-datum and overall case length. A step in the head-end of the gauge, which is 0.005” high, represents the SAAMI minimum and maximum headspace dimensions for the calibre. Your fired cases should sit somewhere between the two steps. When a case sticks up above the higher step, the headspace dimension is longer than SAAMI specifications. To fire the case again in a different rifle, you will need to ‘bump’ the shoulder during resizing to reduce the headspace back to SAAMI dimensions. If you are using the cases in the same gun again, then the case shoulder only needs to be pushed back by 0.002”.
At the other end of this gauge, you can check your overall case length to see if they need trimming. A step in this end allows you to ensure your case length is between the accepted maximum and minimum dimension.
This simple tool replicates a chamber made to the minimum dimensions specified by SAAMI, and it has several uses. When making ammunition to be used in more than one gun, this gauge allows you to ensure it will fit any chamber made to SAAMI dimensions. If a round doesn’t fit into the gauge, then it doesn’t match SAAMI specs, and might not chamber in some guns. This can usually be rectified by revisiting your reloading techniques. If it fits the gauge, but will not fit in your gun, this points towards a problem with your chamber being too tight. You can also use this gauge to check any factory ammunition if you are having issues with it not chambering properly.
Just how much your full-length sizing die is pushing back/bumping the shoulder of your cases can have a big effect on how your ammunition performs. Being able to adjust it can be a great advantage. The L. E. Wilson Case Gauge Depth Micrometer is used in conjunction with their case gauge to measure headspace before and after sizing. The difference between the two measurements is the amount of bump your die is applying to the cases, and you can then adjust your die to increase or decrease it to the desired dimension. The box includes a gauge block, which can be used to re-zero the micrometre if needed, and detailed instructions which are fairly easy to follow. Holding the case gauge and the micrometre together, and then turning the dial on the micrometre, can be a bit fiddly. However, with a bit of trial and error, you can soon get the knack for taking accurate and consistent readings. They recommend making several measurements to ensure you have the correct dimension, and it is a good idea to practice doing it until your readings are the same each time.
The depth micrometre is set so that when it is correctly zeroed, the scale actually reads .100”. If you have to turn the dial anti-clockwise, then the reading will be greater than .100”. For example, a reading of 0.0105” would mean your head space reading is +0.005”. This is an indication that your case is over the maximum headspace for the given calibre. If the case is actually under the maximum headspace, then the reading will be less than .0100”. For example, a reading of 0.095” is an indication that the case is 0.005” under the maximum.
After you have measured a fired case, and got a consistent and accurate reading, you then resize the case, then re-measure the headspace with the gauge. The difference between the two readings is the amount that your die is bumping the case. For example, if the fired case reading is 0.101” and the full-length resized reading is 0.095”, the shoulder is being pushed back by 0.006”.
If your die is bumping your cases more than you need for them to fit your gun, then you can reduce this figure by backing out the body of your resizing die. The amount you need to adjust the die is very small, just a fraction of a turn makes a significant difference, and each time you adjust it you must re-tighten the locking ring to ensure you get precise results. You will have to keep repeating the process until you get the desired amount of case bump, but it is well worth doing to improve the quality of your ammunition.
These gauges are available in brass or stainless steel. They are extremely well made to tolerances that are hard to match with normal reloading equipment. They provide a way to check that both your cases and your completed ammunition are within SAAMI specifications, and the case gauge depth micrometre allows you to experiment very precisely with case shoulder bump. The products are so accurate that it is very important to fully clean and degrease them, as even the smallest amount of dirt or contamination could affect the readings you get. The gauges are solid one-piece items that cannot get out of adjustment, and the micrometre can be re-zeroed, if necessary, using the supplied gauge block and Allen key. Tolerances are so tight that the gauge block is actually engraved to indicate that the .100” zero was set in an environment at a temperature of 72°F.
If you want to improve the consistency and accuracy of your homemade ammunition, then the L. E. Wilson gauges are certainly a step in the right direction.
