Air Rifle Tuning
- By Pete Moore
- Last updated: 12/12/2016


So, for the third and last time, the Remington Express is in the workshop. I have previously fitted a Vortek O-ring kit, shortened and re crowned the barrel, modified and polished the trigger assembly and action internals, and generally had a jolly good time! However, I’m still plagued by a terrible twang upon firing and a rifle that is balanced a little too far forward for my liking. Today I am fitting a precision made kit from TinBum (TBT) and a couple of old pieces of threaded rod from the back of my garage!
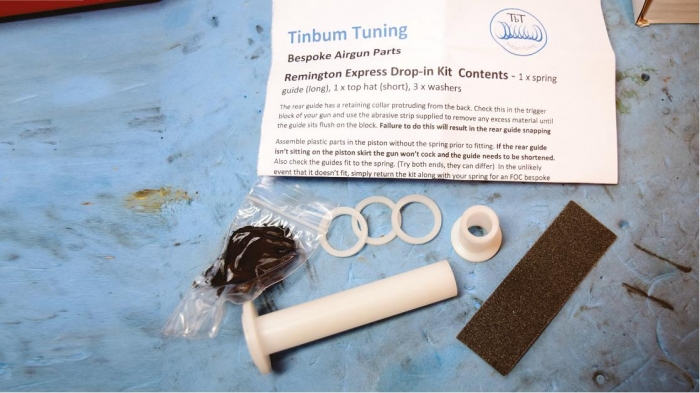
We know that the Remington Express is in the cheaper end of the market, so my intension was to spend as little as possible on tuning. The kit available from TBT (airrifletuning.com or his eBay shop) is also at the cheaper end of the market in terms of price but certainly not in terms of quality, customer service and benefits! Retailing around £25 you get a precisely sized spring guide and top hat, high quality grease, three washers, emery paper and good instructions. Although this is a new kit for TBT, they have sold a huge number of the one they do for the HW77/97 and TX200 range, including a few to me!
Stripping the rifle is easy enough and was shown in detail in the November 2015 issue. Action out of stock, remove the safety, remembering how many turns it took to remove that tiny grub screw, using a sash clamp to hold it together, remove the two pins and the guts can be removed.
When assembling parts, I often have a dry run to make sure all is well. In this case, assembly of the new parts without the spring to check on fit is also recommended in the instructions. Mine was all good, other than removing a very small burr on the inside of the spring guide. Using a top hat where there was none before adds a little pre-load to the spring. I also wanted to use one of the washers at the top hat end to minimise friction, thereby allowing the spring to twist unhindered when cocked and fired. In total these two were going to add about 5mm of pre-load. I know the power was already about correct, so decided to shorten the spring by about 4mm. Again, this is detailed in the November 2015 issue, but basically heat one end of the spring to a dull red, squeeze together a coil and allow to cool. Make the ends as flat as you can and finish to a shine.
Make sure the top hat and the spring guide slide easily on the rod that runs up the centre of the piston. The old spring guide was a fairly sloppy fit so was fine; however the TBT kit is made to finer tolerances and was slightly dragging where the end of the rod was formed to catch on the trigger latch. My trusty Dremel soon had that fixed. The new spring guide and top hat are also a very snug fit on the spring, unlike the old one. As the spring compresses its diameter increases, so the guides need to be snug when it’s in it relaxed state!
There are many debates about how much grease to use, most agree that ‘not too much’ is the way to go. This tends to minimise changes in power caused by temperature and I don’t just mean the weather! Each time you fire you produce a lot of heat, albeit not for very long, but not enough to affect occasional shooting e.g. HFT or hunting. However if you are back yard plinking or target shooting, then repeated firing can warm things up a bit; enough in fact that the grease can change consistency and affect the power. This is not a competition gun or one that I want to strip and check on a regular basis, so I used about as much as I would ever use, and I still had plenty of the supplied (good stuff by the way) grease left.
I am still using the original sleeve, so that goes in the piston first, then one of the supplied washers. Top hat into the spring and that in next, all with a coating of grease first. Back into the sash clamp, two pins in and the tricky safety.
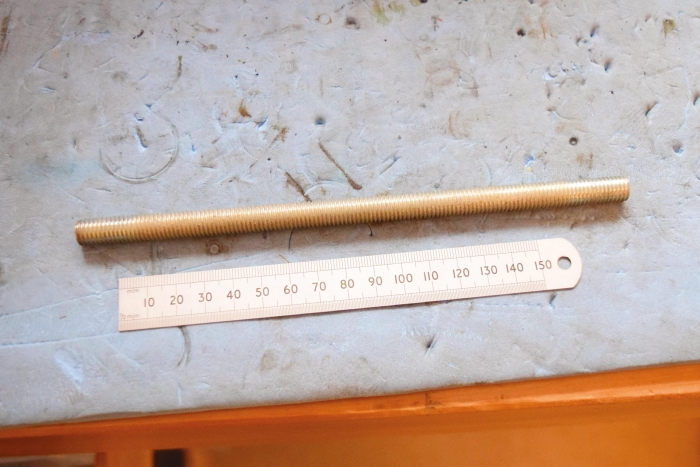
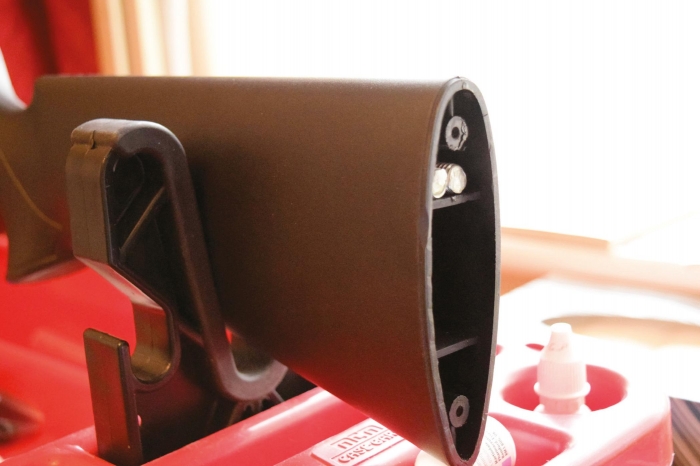
Hurrah! It cocks smoothly and most importantly of all, the twang has gone. And I mean really gone, what a difference! Like most plastic stocks, the sound of firing does resonate a little but it’s a nice noise. I could always deaden it by removing the butt pad and filling the back of the stock with expanding polyurethane foam. I won’t bother, but I would like to fix the forward weight bias balance of the rifle. Some prefer it like that but I am not one of them. So I found two lengths of 3/8” threaded rod that were exactly the correct length to jam into the top part of the stock. Don’t force anything in there with two much force, best not to split the stock…
Yes! Over three sessions in the workshop I have spent only a minimal amount of cash – Vortek O-ring conversion and TBT tuning kit; and some very enjoyable time. The Remington Express is a good value set up already, but now it is transformed. Better weight and feel to the trigger; nicer overall balance; easier to handle; smoother if a little harder to cock; a significantly improved firing cycle with a shorter lock time. And due to better efficiency it’s still producing just over 11 ft lbs having had the spring made shorter, plus it’s more consistent to boot!
All that adds up to a more pleasurable rifle to own and shoot and a more accurate one too; well worth it!
* TinBum (TBT) Tuning Kit RRP £25, includes a sized spring guide, top hat, grease, three washers, emery paper.

click on image to enlarge
click on image to enlarge

click on image to enlarge
click on image to enlarge
click on image to enlarge


