Handloading Part III
- By Pete Moore
- Last updated: 14/12/2016


OK, the time has arrived. We’re going to make our first rifle ammo. In future instalments we will look at each of the manufacturing stages in greater detail, but for now we will just cover the bases for rimless bottle neck non-military cartridge assembly. Later, we’ll devote a separate month to loading pistol cartridges that require a three die set.
Factory Duplication – The First Benchmark
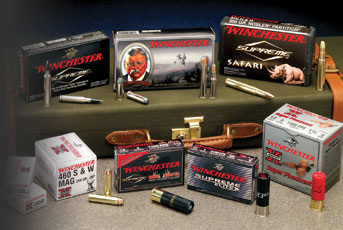
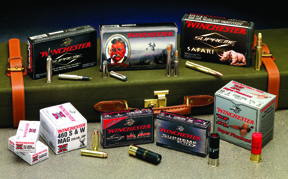
I’ll assume that your factory ammo did not blow the sights off the rifle, so their recipe makes a good starting point. We’re going to use your once fired factory brass for these cartridges. If you’ve got more than one rifle chambered for the same calibre, make sure that you identify which rifle the brass was from and keep the batches separated. Do not use cases you found on the range!
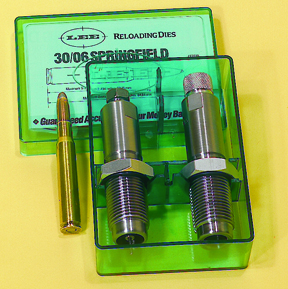
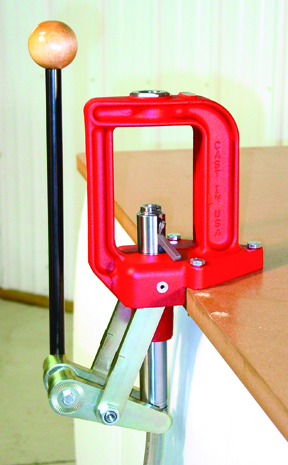
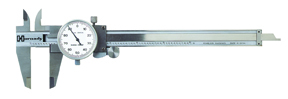
You’re going to need a single station press, appropriate, neck sizing 2 die set, shellholder, loading manual, weighing scales, primer tool, case lube, vernier calliper, powder funnel and powder measure. Consumables will of course comprise primers of the right size and type, propellant and bullets similar to that in the original factory load. Buy the manual first, choosing the publication that gives the best selection of loads in your favourite calibre using readily available powders. Look up your cartridge details on the factory box, they often quote velocity information. Find the bullet weight/style in the manual and look for similar velocities achieved using powders that the gun shop has in stock. The manual will also suggest the ideal type of primer for the chosen load.
Inspection, De-Priming and Neck Sizing
Inspect the once fired brass. Make sure that it is all the correct calibre and headstamp, and is ideally from the same batch. Check for damage and dirt – look inside to make sure that there no stones or other inclusions. Fit the shellholder into the top of the ram, then raise the ram all the way to the top. Now screw in the sizing die and wind it down until its base touches the shellholder. Drop the ram a little then screw the die down ¼ - ½-turn, which will remove any backlash in the press linkage. Next wind down the locking ring until it stops (pinches). Lube the neck of a case, fit it into the shellholder and cycle the press. Remove the case, clean off the lube and try fitting it into your rifle. The chances are that the bolt will not close so remove the case, wind the die down by a quarter turn and repeat the process, not forgetting to lube the neck each time.
As soon as you find that the case will chamber and the bolt will close, firmly tighten the locking ring on the die. You’ve set the die to neck size cases for that rifle only. (If you run out of die adjustment and still cannot chamber the case then we may have a headspace issue – you’ll have to wait for a later episode to find the fix.)
Now slacken the lock ring or grub screw for the de-capping pin, cycle the press to the top and screw down the pin until it just protrudes below the top of the shellholder body. Relock the pin. Place the case in the shellholder and cycle – the spent primer should be removed and the neck sized and expanded to suit the bullet. The die is now set. Keep the first case separate from the remainder of the batch – we’ll be using it as a set-up master from now on. Remove the sizer die, put the master case in the shellholder and cycle to the top. Loosen the central bullet seating punch and back off, then screw the die into the press until you feel resistance. Pinch the locking ring. Half raise the ram, place a bullet on the neck of the case and cycle the press. Remove the case/bullet and measure its overall length – compare it with the Cartridge Overall Length (COL) for the calibre you are using with this bullet.
Keep adjusting the seating punch by a quarter turn until you reach the correct COL. Check the chamber fit of the master round. If the bullet profile (ogive) is different from that specified in the manual we will need to adopt a different method of setting the seating depth, as the bullet MUST NOT engrave (touch) the rifling when the assembled round is chambered. Lock the die. If bullet crimping is necessary for your chosen calibre, we’ll deal with that in a future issue.
Prime Moves and Powder Charges
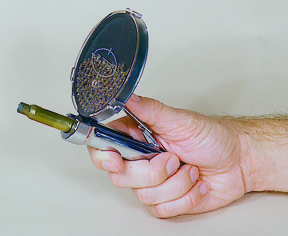
Process your batch of cases and then examine the primer pockets for dirt or trapped anvils. Using either the priming mech fitted to the press or my favourite, a Lee Autoprime, fit the correct primers to the sized brass. Make sure they are fully seated but not crushed – they should feel just below of the head of the case, but must NEVER be proud.
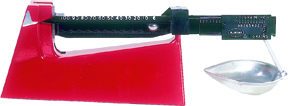
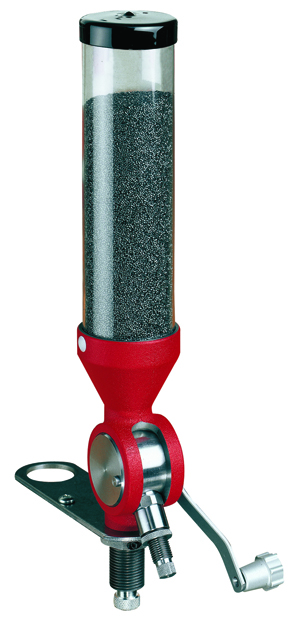
Check the charge weight that the manual gives for the bullet weight and design that you’re using and that gives the same velocity as your factory rounds. If that figure is not available, use the STARTING load charge weight for your chosen powder. Set up your scales and test your use of them by weighing one of the bullets you bought. Remove the seating die from the press and screw in the powder measure. Fill with the chosen powder. Hold the scale pan under the neck and firmly cycle the measure a few times. Return the powder to the measure. Screw out the charge bar a few turns and drop a charge into the pan. Weigh it. Repeat the process until you reach the desired powder weight. Now lock the charge bar and cycle several charges, weighing each one to ensure that the weights are consistent (like cornflakes in a box, the propellant will settle in the measure). Charge your batch of cases, then visually inspect to make sure that they are all SINGLY charged. Decant the unused powder back into the can or bottle.
The Final Push
Remove the measure and refit the seating die but do not fully tighten against the press. Insert the master round, cycle to the top and screw down the die – you should just feel the tension. Remove the master and seat the bullets into your charged cases. If the bullets are loose in any of the necks we have a neck tension issue, do not attempt to use them. Never use a primed and charged round to check chambering – always produce a master cartridge which is un-primed and free of propellant. You’ve made your first batch of ammo. Record the details on your log or on a computerised record. Also keep a note of the details in the box with the ammo.
click on image to enlarge
click on image to enlarge
click on image to enlarge
click on image to enlarge
click on image to enlarge

click on image to enlarge
click on image to enlarge
click on image to enlarge
click on image to enlarge


