Reloading: Back from the future
- By Pete Moore
- Last updated: 23/11/2016


Here in the second part of our reprise, we’ll run through the basics of prep, inspection and readiness for assembly of any popular bottleneck rifle cartridge. We’ll take a batch of your once fired brass and reload them. Start by making sure that they all have the same headstamp. Mixed brass can give poor results or worse, be dangerous.
DOING IT NEARLY RIGHT
Let’s inspect the cases for inclusions (stones and other rubbish) and externally for splits, bulges and rim damage. If they’ve all got the same injuries then they may be telling you something about the condition of your rifle. Let’s fix that first and then start with some freshly fired cases from your rifle! As this is a first time reload we’ll forego the niceties of case cleaning and trimming.
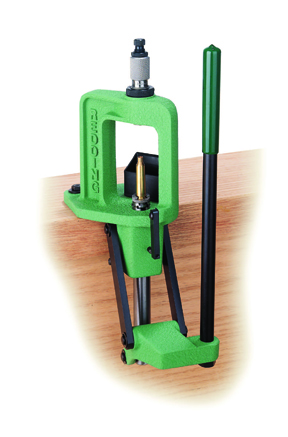
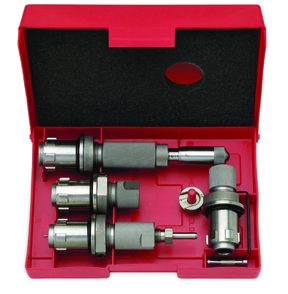
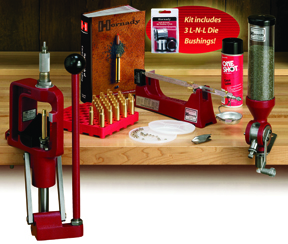
We’ve got our single station O-frame press, shell holder, case lube and dies. If all the ammo is being used in the same, modern, bolt action rifle with good, tight chambering then we can use a two die set comprising a de-capper/neck sizer and a seater/crimp. However, if funds permit then a three die set that also includes a full length sizer would be a sound investment. My favourites mostly come from Redding. Staying with one brand can save you money and grief as the internal arrangement and thread sizes of the de-cap pin, neck expander and bullet seating punch vary from make to make, thereby limiting parts interchangeability.
Make a note of the ballistic info on the box that held your factory ammo, especially the bullet weight/shape and the velocity. Now check the book to find the most comparable data, possibly even marked ‘factory duplication’. It will probably be an American publication and refer to some propellants that are not available here, so for now we’ll stick to Hercules/Alliant/ATK, Hodgdon, IMR and Vihtavuori. Find the brand and type that gets nearest to your spec. Make a note of the suggested primer and any loading notes, especially a little letter ‘c’ against the charge data. At this stage avoid such charges as they may involve special loading considerations.
CHANGING SHAPE
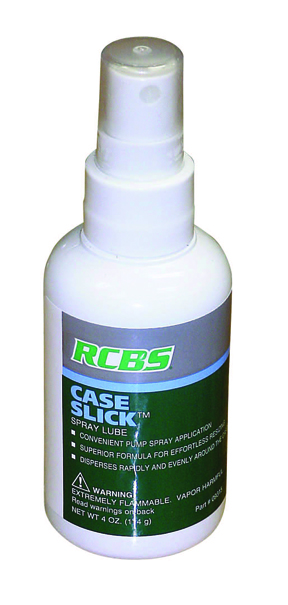
OK. Let’s size your brass. Fit the shell holder and then the sizer die, making sure the de-cap pin is tight and screwed in so that it is protruding. Wind the lock ring towards to top of the die, screw into the press and cycle until the bottom of the die body is about 4mm above the shell holder. The de-cap pin should just fail to reach inside the hole in the shell holder. Half cycle the press and insert a case which has had the neck lightly wiped on your case lube pad. Gently complete the cycle; you should feel some stiffness as the case neck enters the die.
Open the press and inspect the case neck where you should see a faint ring of lube that marks the bottom of the die travel. Re-lube, screw the die into the press by a bit less than the depth of the un-sized neck and repeat the process. Finally repeat in small increments until you feel the die bottom on the shoulder. Back off by 1/8th turn and tighten the lock ring. We must now wind the de-cap pin downwards until the primer is expelled just before the bottom of the cycle. As the ram rises we will feel a slight resistance as the neck expander plug is drawn back through the re-sized neck. Twist the neck of the case against the pad of your thumb to feel for burrs. If any exist on the inside or outside, lightly clean the sized batch with a de-burring tool. Remove the water soluble lube residue with a damp cloth.
FIRE STARTER
Whilst I should bang on about cleaning the primer pockets I’ll just deal with the basics at this point. So, we now need to fit your chosen primer. Whilst the press may well have a priming arm, my advice is to use a Lee AutoPrime fitted with the correct Lee shell holder (the one from your press will NOT fit) and the appropriate reservoir (marked L for large primers and S for small ones). Pour the correct quantity into the pan and shake to get them anvil side up. Insert a case, tip the AutoPrime slightly forwards and squeeze the handle.
This is not a fitness exerciser, just gently squeeze until extra resistance is felt. Remove the primed case and run the pad of your thumb over the primer, it should feel slightly rebated or flush with the case head. If it is proud then we have an issue. If this happens, put it back in the AutoPrime, tip the body back to clear the next primer from the piston and apply a little more pressure. If this does not fix the problem, put the case safely to one side and try the next case. If the problem repeats then stop, as you really need hands-on advice from an experienced handloader. Dirty primer pockets are unlikely to be the cause.
IN THE BALANCE
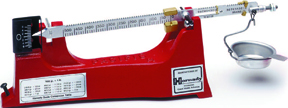
We’ve got our chosen propellant, powder measure, funnel and weighing scales. Let’s make sure we can drive the scales before opening the tub of powder. Whether electronic or beam, make sure they’re set up on a level, solid working surface. Remember that the two types offer a different measuring process. The electronic scale gives actual weight readout whereas the beam is a comparator – comparing the thrown charge with the desired weight that you have set.
If you’ve got electronics, remember to set them to grains and zero them with the cleaned measuring pan fitted. Whilst it does not apply to all electronic scales, make sure that no strong magnetic forces are close to the unit such as electric motors and high power speakers.
If you’ve chosen a new beam scale, follow the assembly guidance that came with the unit. If there is a rattle from inside the base of the weighing pan DO NOT remove it as the makers fitted it to complete the set-up of your machine. With the unit assembled and the pan hanging from the end of the beam, rotate the levelling screw until the pointer is exactly on zero. Gently tap the edge of the pan and make sure that the pointer again returns to zero.
Some scales have two adjustable elements, others have three. It may be fiddly but try weighing odds and sods such as coins, pills and buttons to familiarise yourself with the adjustments. If you have any doubt about the condition and accuracy of your scales then it is well worth checking their readout against a known sample. You can either buy a Check Weight set (mine is from Lyman) or weigh a number of your odds and sods on a scale of known accuracy and compare the results on your unit. Well done. Next month we’ll finish your first batch of ammo.

click on image to enlarge
click on image to enlarge
click on image to enlarge

click on image to enlarge
click on image to enlarge

click on image to enlarge
click on image to enlarge

click on image to enlarge
click on image to enlarge
click on image to enlarge


