Reloading: Necessary Evil
- By Pete Moore
- Last updated: 14/12/2016


Case prep really is a necessary evil; ignore it at your peril. We know that fired brass is soiled with combustion residues from the propellant and priming compound, and it could even have mud and other debris on/in it. Less obvious is the insidious shape change that takes place during each firing, some of which is not corrected by resizing. Not dealing with these issues will result in reduced accuracy and case life, possible die damage and in the extreme, serious gun problems.
Wet ‘n Dry
I remember the claim of a student on one of my handloading courses. His case cleaning process involved sizing and de-priming the brass, placing it into an old cushion cover and putting it through a short cycle in his mother’s washing machine. Yeah, right. We’ll spend a few quid and do it by the book!
Logic dictates that we remove as much soiling as possible before doing any engineering work, especially if we’re going to use a plain steel sizer die. Any grit present will be harder than both the brass and the die, leaving scratches on both. Each new scratch on the die will then be reproduced on every subsequent case. Eyeball each case, especially from older batches for signs of failure such as primer blow-by, burst primers, splits or stretch ring marks. Once cleaned, some of these signs will be harder to spot. To avoid unnecessary contamination of the polishing medium, batches of badly soiled cases should also be inspected for inclusions such as trapped stones, and rinsed in a custom detergent such as RCBS Sidewinder Liquid Case Cleaner. Place them on a tray to dry in the airing cupboard or spend a few minutes waving a hair dryer over them.
Find the Shine
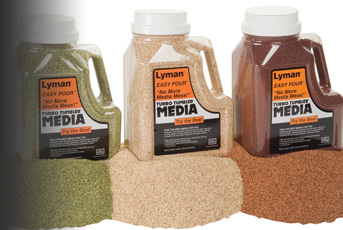
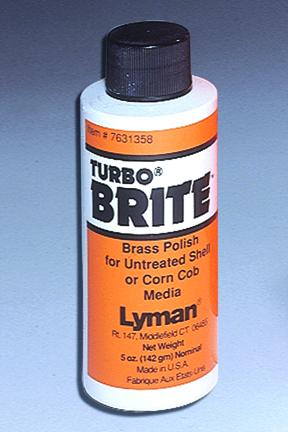
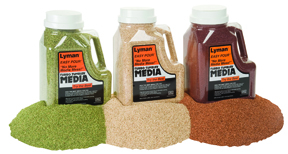
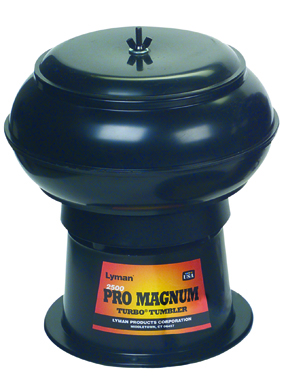
Enter the electric tumbler. Two basic types are offered, the most common being a vibratory system which creates a wave motion in the cleaning medium, the other employing a rotating drum that uses the washing machine principle to tumble the brass and media. (If you decide to order a ‘personal import’ make sure that the voltage is correct). Almost all are designed for use with ‘dry’ polish cleaning media such as granulated corn cob or crushed walnut shells. Whilst these work very well as a dry operation some makers offer a liquid detergent ‘moistening’ additive to speed the process – all well and good, but it shortens the working life of the polishing medium and can make it harder to separate the cases and medium.
Avoid cleaning mixed calibres or batches as cases with different neck sizes will jam together and sorting different headstamps is a pain too. Timing is really a case of trial and error, dependent upon the model of machine, number of cases, degree of soiling and choice of medium but allow at least 40 minutes. If you’ve previously de-primed the cases there WILL be traces of husk trapped in the flash holes. Prick them clean using a toothpick or cocktail stick.
One Time Processes
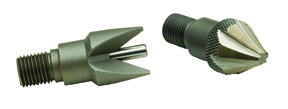
For batches of once fired brass there are a couple of ‘one-time’ processes to be conducted. Re-size and de-prime in the usual manner and then pay attention to the flash hole. It must exist or the cartridge would not have fired, but manufacturing vagaries often leave a trace burr on the inside of the case. A dedicated flash hole de-burer makes easy work of cleaning them. Take care to remove the swarf from inside the case. Now break out the scales and weigh the cases… yes, weigh them. They should all be within a grain or two but now and again a runt or a fatty gets through the makers quality control process. Overweight cases may well have a reduced internal capacity which could cause dangerous pressures with hot loads. Runt cases may have a reduced web thickness that could lead to premature separation. Bin any that you find.
Removing the Growth
A small amount of highly abrasive residue will be present in the primer pockets. A dedicated pocket brush cleaning kit is offered by most makers with heads to suit both primer sizes. As an alternative, put the cases back in the tumbler for a while, but remember to clean the flash holes afterwards.
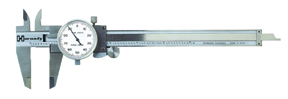
Break out the Vernier calliper and check the length of the batch, finding the shortest, remembering that the neck is unlikely to be square with the head of the case. The case will grow in length with each firing and this will show as an irregular neck form. This causes two primary problems, the first is that the irregular growth causes huge inconsistencies in the tension of any form of taper or roll crimp. Most dangerous is the overall growth in case length as it could potentially trap the untrimmed neck in the throat of the chamber, causing pressures to rocket; anything greater than 2.025” for .308 Win can put the shooter and rifle at risk!
SAAMI Knows Best
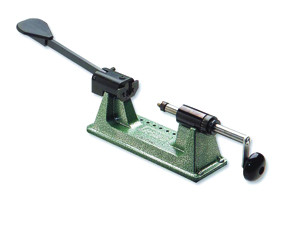
Check your reloading manual to find the correct overall case length (COL). If your shortest case is below the SAAMI minimum tolerance (e.g., for .308 Win, .020” less than the SAAMI Standard length of 2.015” or 1.995”) then measure and reject all below this figure as they are potentially dangerous. If they are within tolerance, place the shortest into the chuck of your case trimmer and adjust the cutter so that it just touches the neck at full travel. Then move the cutter in by about 1/16-turn or, for trimmers with a linear scale, about .002”. Lock the cutter and trim the neck.
Remove the case and check to see that the entire diameter has been trimmed, if not, replace in the collet and trim another similar amount. Repeat until the entire diameter has the same sheen from the cutter. Measure the overall length. If it is still longer than the dimension in the manual then continue incremental trimming until the length is correct. Lock the cutter firmly and trim the rest of the batch. Now use your neck chamfer tool to lightly de-burr the inner and outer rims of the neck. If in doubt, check your work with an eyeglass or Fresnel lens. Job done.
click on image to enlarge
click on image to enlarge
click on image to enlarge
click on image to enlarge

click on image to enlarge
click on image to enlarge
click on image to enlarge
click on image to enlarge
click on image to enlarge

click on image to enlarge


