Bushcraft - Sleep
- By John Fenna
- Last updated: 30/08/2017


One of the most important elements of having a good time in the woods, is getting a good night’s sleep. If your sleeping goes badly, everything goes badly!
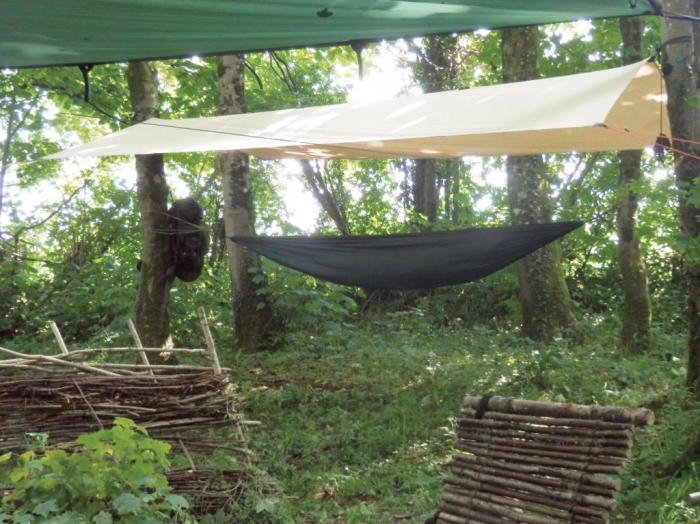
There are no rules as to what is ‘right’ in selecting a sleeping system for bushcrafting – there is only what works for you – but I like to have a system that provides all the comfort I need, and also allows me to keep close to the natural environment I have come to enjoy. For me, this rules out tents as being too confining – confining me to a small interior space and confining nature to the other side of the tent wall – but many other bushcrafters rest better in tents than in other systems. I personally prefer some sort of tarp system that I can rig up to provide shelter from the elements and from which I can enjoy a clear view of the woods, wandering animals and the night sky from the comfort of my bed.
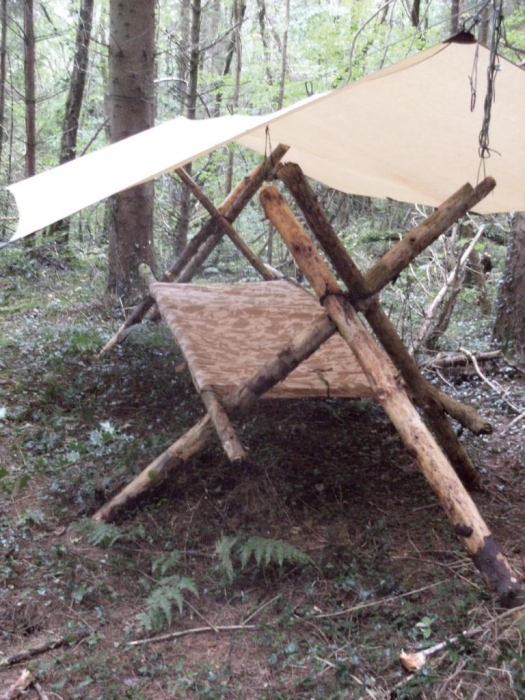
In varying situations, my bed can be on the ground or raised, usually in a hammock or stretcher bed, but is always built to ensure that I am warm and comfortable, no matter what the weather does.
If I am ground-dwelling, my first priority is to clear the ground of twigs, stones, lumps and bumps and then lay down a groundsheet of some sort, as wet ground is cold, can soak your kit and cover it in hard-toshift dirt. If the ground is very wet, I might raise the edges of the groundsheet by laying it over some poles to give it a ‘bathtub’ effect (like a sewn-in groundsheet in a tent) to keep any water from running into my sleeping area. This ‘bathtub’ also discourages draughts and small fauna from finding me.
The next priority is insulation/ padding, as there are good reasons for calling it ‘the cold, hard ground’. This can be a choice between a closed-cell foam mat, a self-inflating foam mat, or an airbed. My closed-cell mats give excellent insulation at low cost, but give little padding from any lumps and bumps that I have failed to clear. My selfinflating mat gives a good level of insulation and padding, while my down-filled air bed is the ultimate in luxury, but was very expensive!
If you are carrying in all your sleep system, you might want to select light and compact gear (normally that bit more expensive) over heavier and bulkier kit (usually cheaper) but always go for kit that will provide the level of comfort you need.
The next part of a sleep system will probably be a sleeping bag, though more and more people (myself included) are turning to quilts or blankets to provide warmth at night. A sleeping bag provides all-round insulation and can incorporate all sorts of baffles, hoods etc. to keep out the cold night air, but, to me at least, they have their drawbacks too. As a short and wide type, I can find sleeping bags too long and too narrow, making them feel too confining, and the hoods prevent me hearing the sounds of nature.
Some manufacturers now make quilts and blankets in the same materials as their sleeping bags, which gives you a sleeping system that is not confining, while still warm, and these, combined with a hat in cold conditions, suit me better than most sleeping bags. Good old-fashioned woollen blankets are still an excellent choice. If the weather is particularly damp, I may top off my sleeping system with a waterproof, breathable bivi bag if I am using a sleeping bag, or a lightweight waterproof top sheet if I am using a quilt or blanket system.
As I like to make a lot of my own kit, I have an ‘all-weather blanket’ made by covering one side of an army surplus blanket with waxed cotton. This often gets used as an under blanket or as a top cover, depending on the conditions.
Most folk like some sort of pillow and I often just put my spare clothing in a stuff sack for this, or if I am looking for luxury, I use a simple inflatable pillow.
If I am using a hammock or stretcher bed, my sleep system is almost identical to my ground dwelling kit. Although I no longer need the padding effect from my kip mat, I still need the insulation, so my foam/selfinflating mat or air bed go into a pocket built into my hammock, while my groundsheet (of reduced size) goes under my hammock as a ‘landing pad’ to stand on as I get into and out of bed, to stop my feet getting dirty.
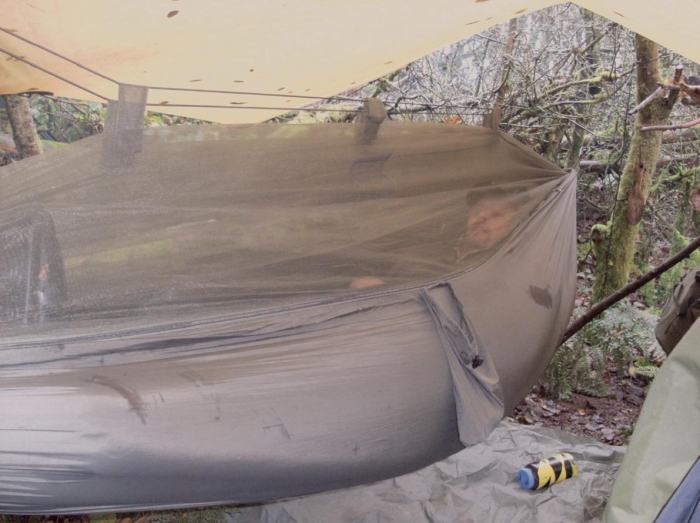
For a standard type singlehanging- point-at-each-end hammock, you can also get all sorts of under quilts for top-totoe insulation, but the hammock I made has spreader bars at each end and twin suspension points (I find it less confining) and so these are not an option for me. A lot of people top off their ‘hanging’ sleep systems with an insect net – often built into hammocks – but I rarely use one myself, as I find it a barrier, separating me from the world – and I do not suffer badly from insect bites.
If you prefer to carry less on your back and more the skillset in your head, you could build your bed from items you find in the woods – as long as you have permission and will not be degrading the woods by so doing.
You could replace your kip mat by making a pine bed. For this you simply make a frame of branches on the ground and fill it with bunches of pine needles, being sure to remove any cones and twigs thicker than your little finger, building up a depth of about the length of your forearm and a little thicker at the head end. Cover this thick, springy, aromatic mattress with your ground sheet and you will have a luxury bed for the night. Unfortunately, this does take time, so is a bed option that is best kept for longer stays in the woods than a quick one-nighter.
Alternatively, you could lay bigger pine branches so that the springy ends are where you lie. This is less tidy and less comfortable, but is still quite good as a bed. Pine boughs can also be used to cover you for insulation.
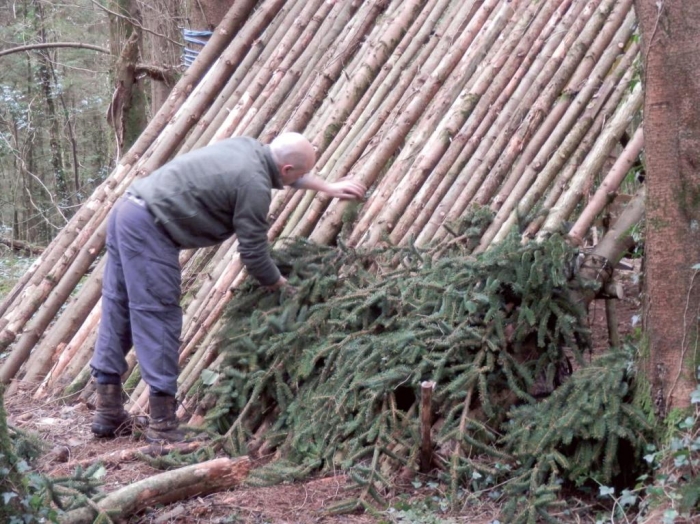
Over your pine bed, you can pitch your tarp or, if circumstances allow, build a natural lean-to shelter. For this, you want to lash a crosspiece between two trees and prop other pine lengths against it at a steep angle – about 60-degrees is about right to shed any rain – and thatch this with pine boughs full of needles. Start the thatching at the bottom and work towards the top and aim at a thickness of about half to a full arm thickness. If you get it right, then even the heaviest rain will not penetrate.
‘Debris shelters’ can be built in the same kind of way by building a structure from branches and covering them in a deep layer of brash, brambles, fallen leaves and other forest floor debris. I have built a debris shelter from nothing but fallen branches and a layer of brambles that lasted, without leaking, for over two years until the ridge pole started to rot where it was supported in the fork of a tree. This debris shelter later formed the gear store at my base camp and was colonised by wildlife, which meant that all the kit stored in it had to be mouse-proofed to survive!
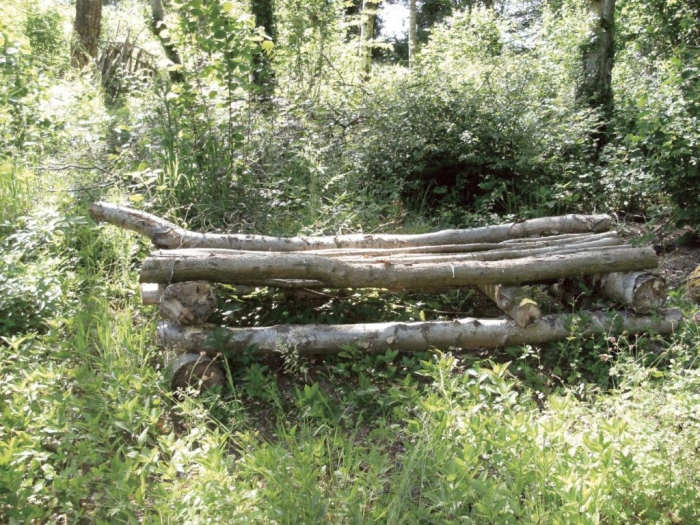
In cold weather, a raised bed is an option, stacking logs in a criss-cross manner to raise your sleeping platform, again of logs, off the ground. The sleeping platform requires thicker logs along the outside edges (to stop you rolling off!) and extra support under the shoulder area, as well as a good layer of insulation – natural or a kip mat – for comfort. For extra warmth, you can put rocks, heated in your fire, under your bed to radiate heat under you all night!
In breezy conditions, a windbreak can be made from hazel uprights woven with anything that comes to hand, such as split hazel or willow rods, even brambles. Good night!
So, there we are – for a good night’s rest you need to be comfortable, protected from wind and rain and insulated from the cold, hard ground, and there are lots of options, both man-made and natural to achieve this. All involve some sort of investment, or time or cash, to achieve, but a good night’s sleep is priceless.
click on image to enlarge
click on image to enlarge
click on image to enlarge

click on image to enlarge
click on image to enlarge
click on image to enlarge


