Pulsar Apex XD50 Thermal rifle scope
- Last updated: 19/12/2016


Ever since consumeroriented thermal cameras hit the hunting market, shooters have been clamouring for a thermal riflescope. But before this could happen there were at least two major hurdles to overcome. Firstly, the refresh rate had to be high enough that the shooter would effectively see the target in real time. Too slow a refresh rate and the target image wouldn’t show the position of the reticle on the target reliably enough to underwrite an effective or humane shot. The second issue was definition. As we all know, you have to be absolutely sure of your target and backstop before sending a shot downrange, and the definition on a small digital image is no match for that of conventional optics.
The necessary synergy was achieved, however, when Pulsar teamed the 50Hz 384x288 thermal sensor (microbolometer), 640x480 OLED display, and germanium lenses from their Quantum thermal monoculars, with the tried-and-tested reticle and zeroing systems from their Digisight digital night-vision riflescopes.
The result is that anyone familiar with either Pulsar’s Quantum thermal monoculars or Digisight riflescopes will quickly feel at home with the controls and options of the Apex.
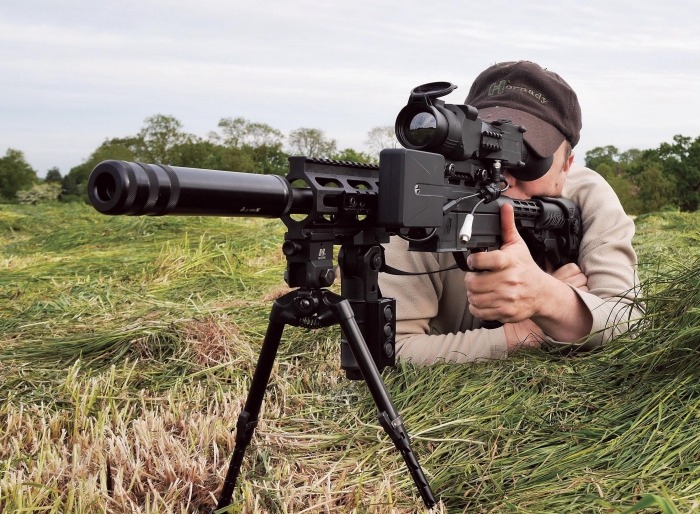
Nevertheless, shooting with a thermal imager would be a new experience for me, so, even though the Apex is rated for heavy-recoiling centrefire cartridges such as the .375 H&H Magnum and 9.3x74, I started by mounting it on a more-forgiving platform: a PCP air rifle!
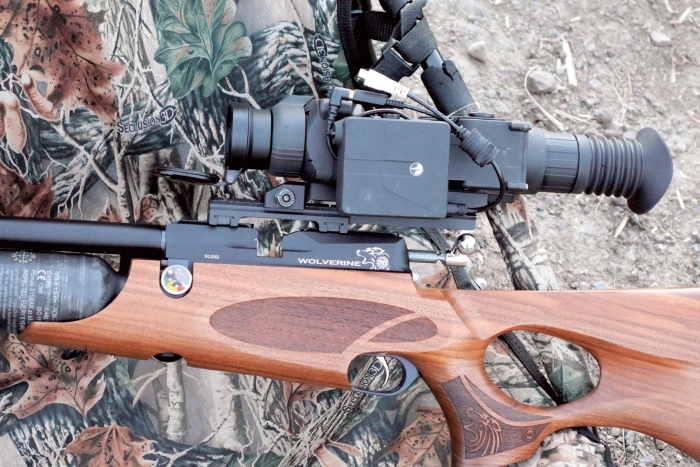
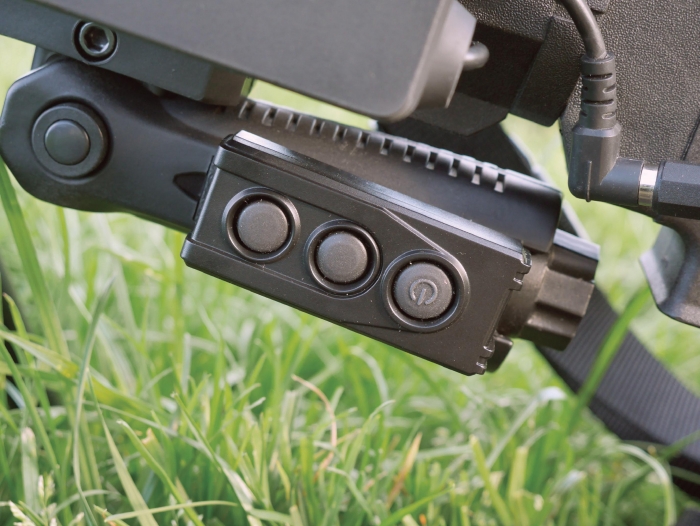
The next step was to give it some power. A compartment in the main body of the sight holds two CR123A lithium batteries, is easy to access and has a nice tethered cover. In powersaving mode, you can make them last up to five hours, but I opted to use Pulsar’s EPS3 rechargeable powerpack (available separately) as it extends run-time, minimises waste, and has a built-in clamp so you can mount it to the accessory rail on the L/H side of the Apex, or to one on your rifle.
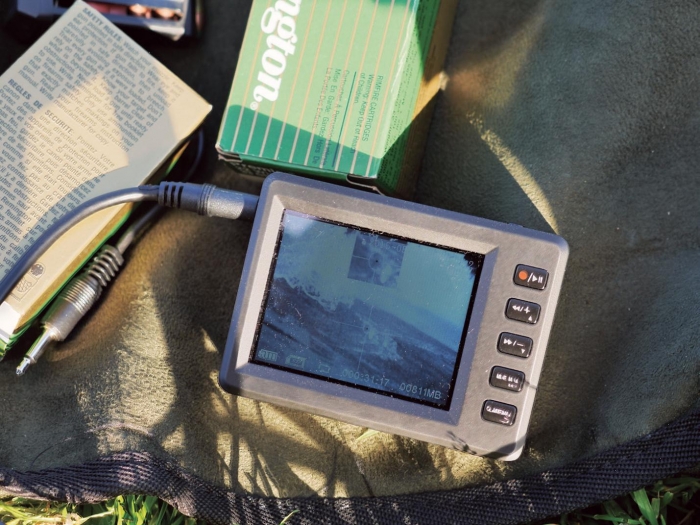
The EPS3 delivers its power through a dualfunction (power/video) cable that connects to a port under the battery compartment. I hooked up the cable’s video jack to a Yukon MPR, which is ideal for recording and reviewing images from the Apex (or any other Pulsar digital device).
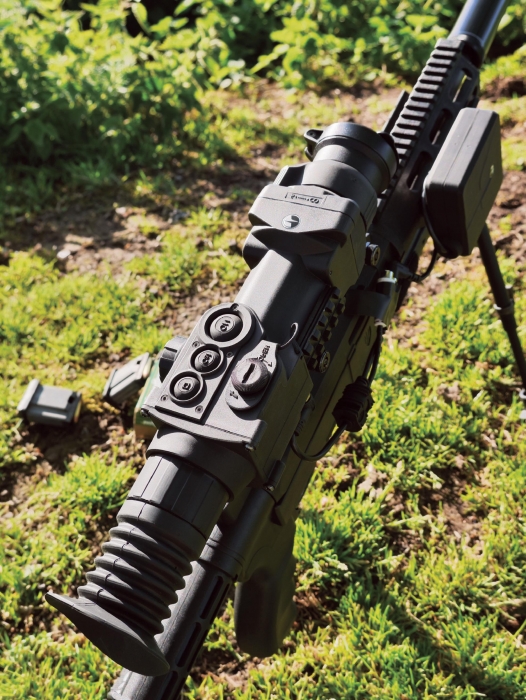
Now it was time to figure out the controls. On top there are three buttons: for power, calibration and polarity/ zoom. All are rubberised for weather-resistance, feel and durability.
A neat feature is that, with the sight activated, a short press on the power button puts the display on standby, saving power and minimising light throwback. A long rubber eye-piece that accommodates the Apex’s generous (67 mm) eye relief also helps hide the glow, and you can turn the screen brightness right down too.
Other functions are controlled by a big dial on the R/H side with a rubberised button at its centre. As well as letting you adjust the magnification in smooth increments of 0.1X, and set the brightness and contrast levels, it provides access to the menu and enables you quickly to scroll through and select the desired settings.
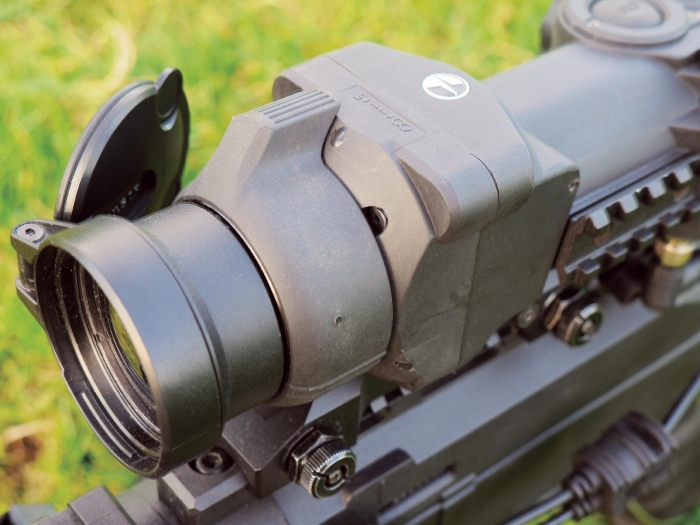
Focus is via a parallax ring aft of the 50mm objective lens and a dioptre ring aft of the control module. The former has a large thumb tab to facilitate grip, whilst the latter is ribbed. The rear ring needs to be set only once, but the front focus needs to be adjusted for range.
Once you’ve got the display and the target focused and the polarity, brightness and contrast set up as you want them, it’s time to zero in.
For this, you obviously need a target that shows a heat gradient. In sunny conditions the different heat absorbency/reflectivity of black print and white paper means that simple homeprinted targets can work well, especially at shorter ranges. Nevertheless, when the sun goes in or the weather cools everything very quickly fades to a more-or-less-uniform grey.
In these conditions, using a chemical heat pad taped to the target as an aiming mark, and observing your fall of shot with a conventional spotting scope is the way to go. Meanwhile, small plastic bottles filled with hot water from a thermos make great plinking targets.
Like the Digisight, the Apex offers a choice of two one-shot zeroing modes: ‘live zero’ or ‘freeze. In either mode you begin by shooting a sighter at the target. (If using a bolt-action, use the zero function to bore-sight first.) On entering zeroing mode you’ll see an ‘X’ in the centre of the reticle. Shoot one round (or centre the target in the bore if boresighting) then centre this ‘X’ on the point of impact (or the centre of the target if boresighting) using the horizontal and vertical controls. Once done, press to confirm, and the ‘X’ will disappear as the image refreshes and centres the reticle on its co-ordinates.
In ‘live zero’ mode you have to keep the reticle/ rifle aligned with the target while moving the ‘X’, but with ‘freeze’ you simply centre the reticle on the target and then push the button to take a still image of the sight picture, and move the ‘X; over this. Effectively this reduces the need to have the rifle perfectly still whilst adjusting the reticule coordinates (extremely useful if you’re without a stable rest).
The sole drawback of this slick system is that it only works at the scope’s native magnification of 2x (any degree of digital zoom is automatically cancelled when you enter a zeroing mode), and the smaller target image makes a precise zero harder to achieve.
Having shot an initial confirmatory group, finer adjustments can be made via the vertical and horizontal co-ordinates shown in the zeroing screen. These are quite coarse, however, with each increment moving the impact a full 3cm at 100 metres. On the plus side, the range of horizontal and vertical adjustment is an ample six metres at 100 metres.
Most importantly, the digital adjustments are entirely consistent: tracking and holding zero perfectly. What’s more, the Apex can store three zero settings, so you can instantly reset the scope for up to two additional guns, loads or ranges, plus you can easily note down the absolute coordinates for any zero and dial them in as necessary.
You can also improve the precision of your zero by selecting one of the simpler reticles from the 10 different patterns available. If you prefer to use a more complex one when hunting – where scaled ranging or drop compensation may be desired – that’s no problem, as the zero will remain constant.
Helpfully, a downloadable data sheet gives the precise subtensions for each pattern. Reticles can also be selected as black or white, but they always have a contrasting central cross. Thus, in white=hot mode a white reticle works best since its black centre doesn’t get lost in a warm target. Helpfully, switching image polarity also changes the polarity of the reticle.
A unique feature of the Apex is its picture-inpicture (PiP) function. This shows a fully-magnified target image and reticle in a window centred in the top part of the screen, while the rest of the screen shows the unmagnified reticle and image. Thus, you simultaneously get a detailed image for aiming and a wide-field-of view for context. And when you turn PiP off, the magnification reverts to its previous setting.
PiP can be a little confusing the first few times you use it, but with a bit of practice it becomes a real asset. There’s an activation button on the wireless remote too, so switching viewing modes is literally at your fingertips.
Having used the Daystate/ Apex combination successfully on targets and then on feral pigeons in a cow shed, I moved the Apex onto a Remington 597 in .22WMR. This was partly because I still wanted to keep ranges short, and partly because the Apex blocked bolt operation on all my left-handed centrefire rifles! I did pretty well with the Apex on the little rimfire magnum, however, taking three foxes in a week at 50- 60 metres, and I was soon itching to try the sight out at normal foxing ranges.
My chance came when I got an MDT TAC 21 chassis for my Remington 700 in .204 Ruger, as its integral rail raised the Apex just enough to clear the bolt. Using a heat pad, I soon got the rifle zeroed precisely enough to ring a nine inch steel gong consistently at 200 metres. Now, I felt, I was ready to do some proper foxing.
In the field, the image in the scope was great. I could spot foxes, badgers and deer at well over 500 metres and identify species reliably at over 200 metres, but the foxes hadn’t read the script (or perhaps they had and didn’t like the ending I proposed), or maybe I’d already mopped up all the gullible ones, because I couldn’t get them to come close enough, or stay still enough to give me a shot I was happy taking.
So why not shoot them at 200 metres? After all, I could see and hit a steel plate at that range. The truth is that beyond 120 metres or so a fox becomes a pretty small target whose precise shape can be concealed by the limits of digital definition, and by brightness, contrast and calibration settings that may need quick and accurate tuning before a shot can be confidently taken. Nevertheless, with more time, I’d undoubtedly have got better at reading the image, and faster at tuning it.
The Apex is a superb bit of kit that opens up a whole new dimension in hunting. In my dozen or so outings with the Apex, it proved deadly at airgun and rimfire ranges, and I’m sure it would have proved equally so on the centrefire. If you’re serious about your night shooting, then the Apex is worth every penny! Contact: Thomas Jacks Ltd. www.thomasjacks.co.uk (trade only – order through your local dealer).
PRICE: £3399.95
SUPPLIED ACCESSORIES: Carrying case, Wireless remote control, User manual, Cleaning cloth, Video/Power cable, Warranty card
click on image to enlarge

click on image to enlarge
click on image to enlarge
click on image to enlarge
click on image to enlarge
click on image to enlarge
click on image to enlarge


