Rifle Basix Replacement Trigger
- By Pete Moore
- Last updated: 16/12/2016


There’s little doubt that one of the corner stones of rifle accuracy is a good trigger and over the years gun manufacturers have come out of the dark ages and started to offer better, off-the-shelf units. Ruger’s centrefire bolt-action M77 series is now in its third incarnation (the M77 Hawkeye) which comes equipped with their LC6 (light & crisp) mechanism. Certainly an improvement over the older M77 Mk II, but for the more discerning shooter still a bit on the heavy side.
Unlike a Remy 700, which has three adjustments built into its trigger mech as standard, the LC6 does not, so there are only two alternatives; 1 – get your gunsmith to sort it or 2 – buy a drop-in replacement. Some of the better and more cost effective units are from Rifle Basix and I have one in each of my Ruger M77/22 and M77/17 rimfires and they make a serious difference. So it was with some pleasure I noted they now make a unit for the Hawkeye (RU-MK II), which also includes the 77 Mk II and by association their Scout Rifle.
Non-Gunsmithing
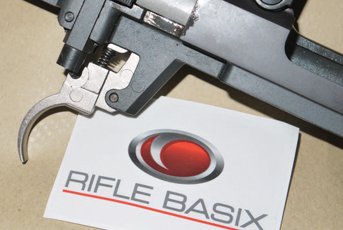
The RU-MK II offers that magical concept of non-gunsmithing and unless you are mechanically ‘challenged’ it’s an easy D.I.Y. job. The kit comes with a replacement trigger blade assembly, weight of pull spring and adjuster, Allan key and safety adjuster screw for the M77’s rather specific 3-position design.
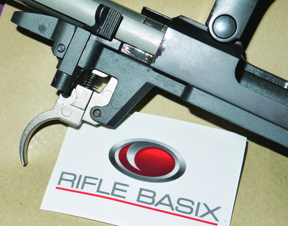
Start by taking the action out of the stock and removing the bolt then place tape over the sear pivot pin so you don’t lose it (VIP). Push out the trigger pin and retain it as it will go back in with the new unit but remove the old trigger and its spring. Screw in the weight of pull adjuster a little and drop in the spring from the top – wide end upwards, then refit the trigger blade assembly with the existing pin as mentioned.
Refit the bolt, close it and pull the trigger, you will feel the break and if it’s too light or heavy wind the adjuster screw in and out as desired to get your selected weight. The RU-MK II can be set from 14oz to 2.5 lbs.
The Clever Bit
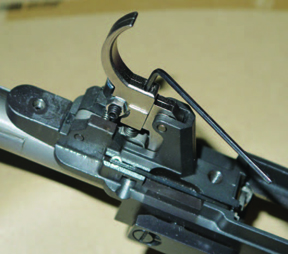
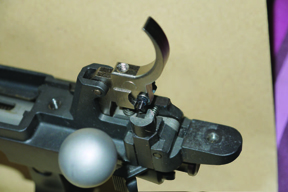
Now for the safety which is linked to the trigger by a transverse screw that sits at 90° to the blade (on the right) and impinges on the base of the rotary, 3-position drum. The Ruger design offers forward FIRE, middle SAFE with bolt operation and rearwards SAFE with locked bolt; this is achieved by steps cut in the base of the drum that controls movement as it turns.
Now for the safety which is linked to the trigger by a transverse screw that sits at 90° to the blade (on the right) and impinges on the base of the rotary, 3-position drum. The Ruger design offers forward FIRE, middle SAFE with bolt operation and rearwards SAFE with locked bolt; this is achieved by steps cut in the base of the drum that controls movement as it turns.
Refit the bolt and cock the action. FIRE - the safety screw should be clear of but under the base of the drum so the trigger can fully function, there is a picture in the instructions. SAFE with bolt movement – cock the action and move the safety catch to its middle position, move safety screw in ½-turn until the tip contacts the base of the drum and lightly tighten the lock nut. In this position check that the trigger does not operate but you can cycle the bolt. Also at this stage flip the lever back to FIRE to confirm that the trigger/safety functions correctly. SAFE bolt locked – cock as before and swing the lever to its third/final position, here the trigger will be blocked as will bolt movement.
When you are happy that all three settings function properly tighten the locking nut. On my two Ruger rimfires and for peace of mind I set up as described and used some thread locking fluid to ensure there was no movement after a lot of use. Rifle Basix also make kits for most other common rifles.
The Rifle Basix Inc. RU-MK II replacement trigger is priced at £75 and is available from South Yorkshire Shooting Supplies Ltd, 01226 756332 www.rimfiremagic.co.uk, www.rifleBasix.com
click on image to enlarge
click on image to enlarge

click on image to enlarge
click on image to enlarge
click on image to enlarge


