Stoeger Manual Pump
- Last updated: 26/01/2022


I always remember trying out one of the very first dedicated airgun pumps, when some chap offered me a go on a shooting range, quite a few years ago now! I loved the thought of breaking free from air bottles, but the backbreaking reality of that early model had me politely smiling and hiding my true reaction - my inner voice questioning the sanity of the owner!
Well, what a difference a few years makes and some clever development along the way! I’ve now been using a pump regularly as my main charging method, just holding a bottle in reserve for awkward/large capacity guns that I may get through for testing now and then. And for those unfamiliar with the modern airgun pump, if you are just topping up a PCP’s cylinder, rather than filling from scratch (which is most of the time in my experience), then the process is wholly manageable - depending on the particular pump of course.
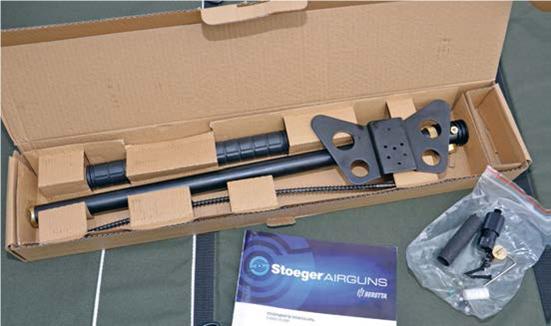
Stoeger is an Italian brand and part of the Berreta group. Having just released their first pre-charged pneumatic, the XM1, they also now produce their own dedicated manual pump. I had the XM1 through for a test recently and alongside came the pump - flat packed and supplied in a padded carton. So, let’s see how easy it is to assemble and how it performs under pressure!
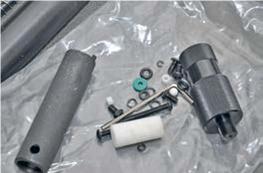
Inside the box, there’s the main pump body assembly, rubber-coated handlebar, base and instruction manual. There’s also a bag containing all the screws, washers, spare seals and the moisture trap. Looking through the manual revealed that assembly is covered by one very simple diagram, which doesn’t show everything! That said, assembly really is very simple, so within most people’s capabilities. As for maintenance further down the line, using the spare seals etc, I would personally need more assistance than the tiny diagrams in the manual! Once you become familiar, I’m sure it’s pretty simple.
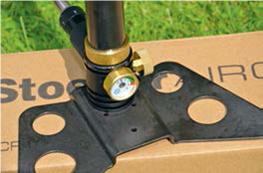
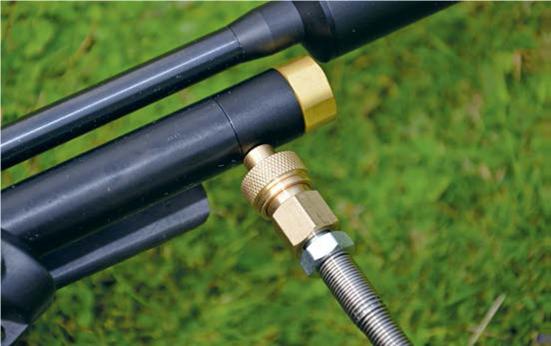
The main tool required is the Allen key supplied, although spanners may be needed for gently tightening. Take the two longest screws in the bag and screw the handlebar onto the top of the body tube. Now, using the four tiny screws and washers, fix the base plate into position, making sure the longest part of the legs protrude on the pressure gauge side. Attach the brass bleed valve if it isn’t already, then take the small black moisture trap assembly and screw that gently into the main air inlet within the body. Next, screw the airline into the moisture trap and then screw on the Foster-style female connector. The pump, in theory, is now ready. Attach the rifle’s filling adaptor (Stoeger’s XM1 came with a simple snap-fit design), but Best Fittings make brilliant Quick Couplers for the job if necessary.
With the gun connected, the pumping can start. Just after assembly by hand, it’s perfectly normal that there may be leaks. A very gentle nip-up with spanners should do the job. I had to use a small doughty seal (available for pence) between the moisture trap and cable to stop a tiny hiss, but no big deal.
Amusingly, the instructions suggest immersing the pump underwater to find the leak, but I really wouldn’t recommend it! With everything nipped up and properly tight, it was time to get hands-on.
Many airgun shooters I’m sure, have no experience of using one of these airgun pumps, so for those who have opted for the easy life up until now, here’s a few basic rules.
Firstly, make sure that the cable is free from strain and kinks of any kind. The Stoeger comes with the more preferable thin cable, which makes it far more flexible and versatile I hasten to add. Now, stand on the base plate to steady the pump, keeping the knees bent. Pull up and raise the handle, just until your legs are straight, then push straight down again, and the real art is to bend the knees at the same time as that all-important downwards stroke. Repeat the cycle until the gun’s pressure has hit the prescribed fill pressure from the manufacturer. Open the bleed valve and release the air, then disconnect from the gun.
As previously mentioned, I had Stoeger’s new XM1 PCP to hand, and having shot it ‘empty’, it was as good a test candidate as any. I decided to compare the pumping, the number of strokes and overall feel against my own personal pump from Hill, and whilst this market-leading model is a class act to follow, it would be an interesting exercise. So, using the same technique filling the XM1 from a residual pressure of 80bar up to 200bar, the Hill pump did it in 66 strokes, while the Stoeger pump did it in 78.

click on image to enlarge
click on image to enlarge
click on image to enlarge
click on image to enlarge
click on image to enlarge


