Reloading: Best Practice
- By Pete Moore
- Last updated: 23/11/2016


Let’s start with the big picture. If you use hand loaded ammo in any ‘public’ space then you’re potentially legally liable for the consequences of any failure that may occur. Most ranges and clubs require their users to carry public liability insurance that would cover such an event. Membership of the major shooting associations generally includes such cover – but it’s advisable to read the small print just to establish the extent and more importantly, the exclusions. Whilst it’s comforting to know that your wrecked rifle and any 3rd party claims should be covered, the loss of your sight or some fingers cannot be replaced by the insurers!
Less well aired are the domestic implications of handloading. Do your household insurers (both property and contents) know that you legally possess primers, propellants, ammo and firearms? The catastrophic fire may be started by an untended chip pan or mice nibbling the wiring but if your shooting kit gets caught up in the inferno you may just have given the insurers a get-out clause. Let’s face it; insurers are only low class bookies. If I place a winning bet on the 3.30 at Ludlow then the bookie will pay the agreed amount without quibbling. If I bet the insurers that my house will not burn down, we agree the stake money but they’ll do their best to screw the odds as low as possible in the event of a claim… or find reasons to get out of the bet completely. Declare what you do and what you’ve got or your premiums may just be a waste of money.
SAFE AND SOUND
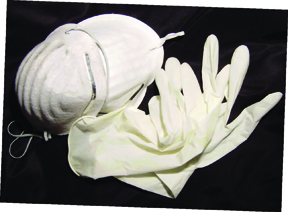
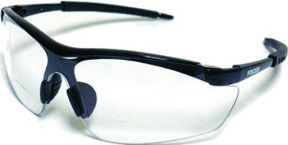
Clothing and personal protection are next on the list. We all wear ear defenders and shooting glasses on the range but what about your fashion sense in the loading room? Make the wearing of impact resistant shades a default. From a burst primer to a splash of molten lead they could make the difference between a guide dog and another day on the range. If you’re handling lead then thin cloth or disposable nitrile gloves are essential. If you cast bullets then a heavy set of welder’s gauntlets, tough jeans and heavy boots may reduce the extent of the skin grafts.
If you smoke, leave the fags and lighter in another room… even the fines from the primer pocket can be flammable. That brings us to location. If space permits, allocate a distraction free room to your handloading, keep all the kit covered, out of reach of ankle biters and sheltered from direct sunlight. Casting MUST be done in an area with good ventilation, free from food/food production and anything flammable. Make sure that all your loading areas are well lit - misreading a scale or failing to spot that double charge could cost more than a couple of 60W light bulbs.
PRODUCTION PRIORITIES
First rule is to keep all materials in the supplier packaging at all times when not in use. The second is to keep detailed records of everything you make, shoot and use. Label every box of hand loaded ammo with as much info as possible.
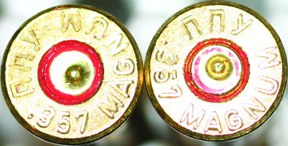
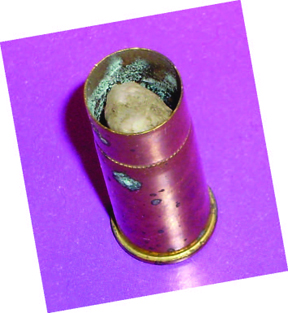
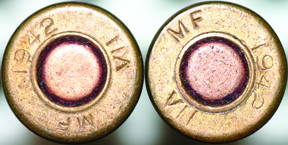
Unless you know its history, never use brass you found on the range. Keep all your cases in batches according to headstamp and number of loadings. Prior to preparing cases you must inspect them carefully. Look for rubbish inside, bulges or splits, damage to the rim or burst/loose primers. Check new brass for a flash hole and remove burrs.
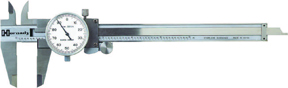
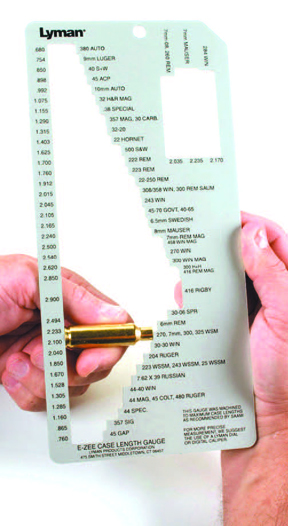
Reject all the defects. Always use case lube when working with non-carbide dies and note the ease with which the brass goes through the re-sizer, an abnormally stiff case warrants close inspection. Check the growth of the case, use the Lyman case length gauge or compare the measured case with the known chamber dimensions. If in doubt about the numbers, refer to a good loading manual or to the cartridge data section of the SAAMI web site: - http://www.saami.org/specifications_and_information/index.cfm?page=pubs
Trim to the specified length, carefully de-burr the inside and outside of the neck and then try a dry chambering in the rifle. If the bolt closes freely but the extraction is stiff, look carefully at the regularity of the case wall… and examine the chamber for possible defects. Trim the whole batch to the same size.
ASSEMBLY - THE ARGUMENTS
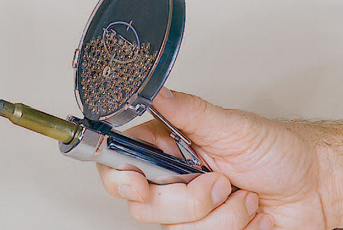
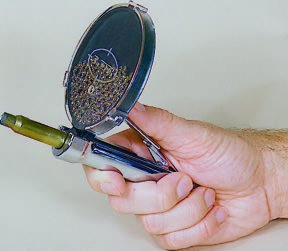
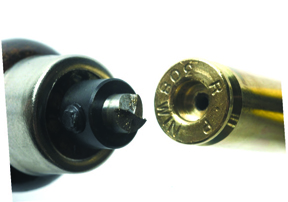
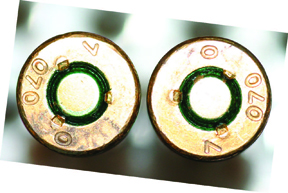
Priming can be dangerous. Military brass may have been fitted with staked and even sealed primers. Unless the stake or ‘crimp’ and weatherproofing are removed you will damage the new primer or worse, detonate it under the pressure required to ‘fit’ it. If you’re using a Lee AutoPrime or similar, make sure that the primers are all facing ‘anvil up’ before you fit them. Hold the priming tool at a slight angle in order to feed the next primer on to the piston. Never ‘double cycle’ as you may crush another primer under the first, possibly causing it to detonate. If you’re using a primer feed tube on your press, ensure that they’re stacked properly and cycle the press gently. A mass detonation of the primers in the tube is rare – but it has happened.
Use a loading block when charging the primed cases with propellant. Make sure the scales are accurate by using a check weight set or items of known weight. Ensure that you are using the correct propellant product number and that it is fit for use. If it has an extremely acrid smell or has changed colour (usually a brownish hue) from that originally purchased then it has probably degraded. Use it as garden fertilizer and buy a new tub. Double check the recommended charge weight given in the manual and confirm that it is for the correct bullet weight AND profile.
Before charging the cases, cycle the powder measure until the contents have settled. Always maintain a high level of powder in the measure. Check the thrown weight of at least every tenth charge… the powder measure could have lost its setting. After charging the batch, conduct a careful inspection to ensure that each case contains a single charge. Return the excess propellant to the tub or tin as soon as you’ve finished.
Eyeball the batch of bullets for runts and those with damaged bases. Measure the cartridge overall length of the first assembly and compare it with the specified figure. Make sure that the ogive of the seated bullet does not engage the rifling when the cartridge is chambered. Now check the entire finished batch for the presence of a primer and good neck tension holding the bullet. Job safely done!
click on image to enlarge
click on image to enlarge
click on image to enlarge
click on image to enlarge
click on image to enlarge
click on image to enlarge

click on image to enlarge
click on image to enlarge
click on image to enlarge
click on image to enlarge
click on image to enlarge
click on image to enlarge
click on image to enlarge


