Pulsar Quantum HD38S Thermal Monocular
- Last updated: 27/01/2017


The HD38S, exclusively distributed - along with the rest of the Pulsar range - by Thomas Jacks, has been selling so fast that there’s a waiting list, even for those with money to spend, let alone for an example to review. I’m very grateful, therefore, to a very good friend of mine, for lending me the example on test, not just for a couple of days, but for two months, giving me plenty of opportunities to put it through its paces in the field, and revealing precisely why the HD38S has been flying off the shelves.
I’ll start with one example, and finish with another I was recently watching over a field of ewes and lambs to make sure that any foxes that took an unhealthy interest didn’t do so for long. As the light went, the rabbits started coming out, so I thought I’d see how far away I could pick one up with the thermal. The answer was: almost 500m. I suspect the HD38S could have done even better too, if not for the wood on the far side of the valley blocking the view. Or so I thought.
Then I spotted something in the wood. As I watched, I could tell from its size and how it moved that it was a badger, rooting around at the foot of a mature oak. I observed it for a bit and then caught a flash of white (setting the polarity to white-hot is the best way to spot things) over to the right. Just a glimpse but it had my attention. Soon, in between the trees, I could see two people and a dog out for a walk. No problem, there’s a footpath there, but I was interested to see how the dog, and the badger, reacted as the distance between them closed. Nothing much, actually: when the dog got within 30m or so, the badger sensed trouble, and simply mooched off into the next field.
Pause now, and consider that this was over 500m away, in utter darkness (no moon and overcast).
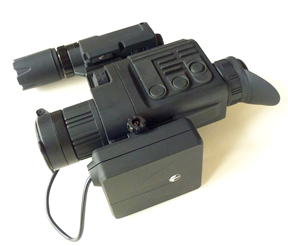
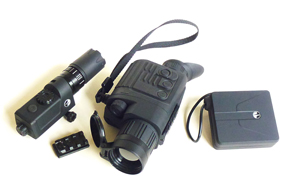
Sometime later I spotted a fox coming up the valley from the right. Thermal makes spotting easy, because animals are literally highlighted in the image, so a quick scan is all you need to pick up a potential target. This fox wasn’t in a hurry, and I could tell which way it would go, so I switched on the (Cobra Optics Titan) NV add-on and (Pulsar L808S) illuminator attached to the riflescope and identified a good point to shoot it (safe backstop, no sheep downrange). One last check on the fox’s progress and then it was time to line up the rifle and wait for it to walk into the field of view. Five seconds and one shot later, it was all over.
The key thing here is how the thermal buys you time. Time to get ready. Time to check safe. But also the amount of eye strain it saves you in a night’s hunting, because it instantly shows you where something isn’t as well as where it is.
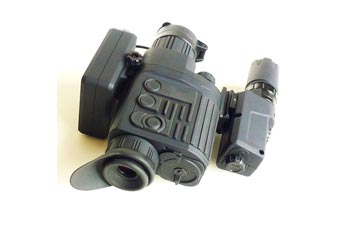
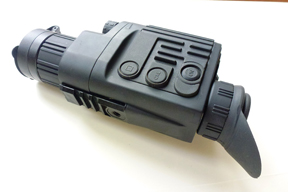
Some descriptive stuff about the unit itself The first thing you appreciate is how light and compact it is, and then how easy it is to get up and running.
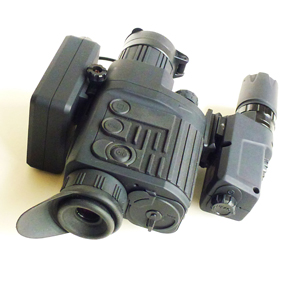
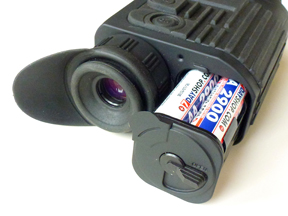
It’s powered by 4 x AA batteries, or an external EPS3/EPS5 battery pack – which I never used, as I never needed to - and runs for 4 hours on the set of 2700 mAh Annsman rechargeables supplied (Thomas Jacks give you a charger for them too). So with a spare set in your pocket as backup you’re good for all but the most extreme outings. Batteries are easy to install too. Just rotate the locking lever located to the right of the eyepiece and the battery module pops out. It’s true that the batteries are considerably easier to clip into it than to remove, and that the polarity markings on the side are hard to read, but a bit of Tippex by the “+” terminal solves that problem and experience teaches you which batteries are easiest to lever out first. A spare battery holder is supplied as standard, which is perfect for quick changes in the field.
After checking that the flip-up lens cover is closed, just blip the power button to boot the unit up. A Pulsar logo will appear, you’ll hear a total of five calibration buzzes, and in around 20 seconds the HD39S is ready for use.
The first thing to do is to rotate the ring behind the rubber eye piece to focus the screen. The numbers in the display at the bottom make it easy to get this pin-sharp. Now focus the objective lens. Incidentally, the tension on both focussing rings is just right: no strain and no slop.
The image that appears is very smooth and detailed. For example, I was able to watch bumble bees hovering around some pussy willow at 25m (“fairies at the bottom of the garden,” I thought, with a grin).
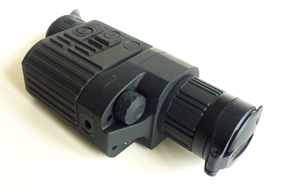
Better still, you can adjust the brightness and contrast independently, simply by blipping and rotating a control dial (“encoder”) at the front right of the housing. This comes in really useful at night, when you can minimise eye strain by dialling the former value down to 0 and the latter to about 4. You can easily dial up again to obtain more visible detail once you’ve spotted something, but the initial “pick-up” is just as easy with the HD38S dialled low.
Dialling down also reduces the light cast on your face by the screen, though it does nothing about the bright/large green LED that indicates the power is on – but a bit of black tape with a pinhole in it fixes that. To be honest, I’d also like the rubber eye cup to be a bit larger and softer, for better comfort and to cut out reflection from behind.
Back to the encoder: pushing and holding it for a couple of seconds accesses the menu. This lets you set the time (very useful for logging observations), adjust the display brightness to complement the image, set the operating and calibration modes, set up the format for video out for use with an external monitor or Yukon’s MPR recorder (the video and external power jacks are underneath the housing protected by a rubber cover), and a neat dead-pixel-compensation facility, which I didn’t need to use. To select a setting, just push or rotate the encoder then push-and-hold again to exit.
Calibration can be set to automatic (A), manual (M) or semi-automatic (H). I found “semi-automatic” the most practical, though manual calibration is silent, which can be an advantage. The operating modes are brightness/contrast pre-sets that give you an starting point for “city”, “forest” and “identification” – the latter being the most useful as it shows hot objects in greater detail - though tuning using the encoder will optimise the image for specific conditions.
The only issue I had with the controls is that the encoder is easy to move accidentally – for example, I’d shot three foxes over three hours from the same stand. As time passed two had cooled from white to pale grey, but when I looked back at the third - 200m away - it had got brighter. I assumed it had only been incapacitated and not killed by the first round and had moved, so shot it again. Only then did I realise I’d accidentally dialled up the contrast and it had been stone dead all along.
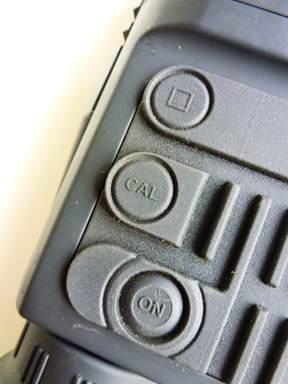
So the encoder could do with some sort of lock, and the same is true for the power button, which would be improved if it worked on a push-and-hold basis, as it’s all too easy to operate it accidentally, requiring a re-start or running down your batteries unnecessarily.
The other buttons on top are for zoom (2x digital: most useful for checking you have the best possible focus) and polarity (black=hot/ white=hot): blip or push-and-hold respectively; and for calibration.
The auto and semi-auto calibration modes take care of the latter function, automatically re-calibrating at intervals, but the latter also lets you recalibrate manually if the image becomes striated in between – natural enough with everything the sensor is having to do. Two faint whines later and you’re good to go.
Other features are two tripod mounting sockets – one on either side - that can also be used to attach a wrist lanyard, and a Weaver rail that the external power pack mounts to. The rail is an odd spec, though, so if, for example, you want to add an IR laser –even one of Pulsar’s - for designating/illuminating targets when working as a spotter for a shooter with conventional NV, you’ll need to fit a Pulsar adapter rail (not supplied) via one of the tripod threads. Not perfect, but at least the provision of two threads, and the availability of a suitable adapter make it possible, even with an EPS already fitted.
There’s also a padded black ballistic nylon carry case, with pockets for spare batteries and a lens cloth, a belt loop and an adjustable shoulder strap with a snap-clip that lets it double up as a belt.
Summary
So, there are some minor ergonomic niggles with the HD38S, but they pale into insignificance alongside its range, image quality, adjustability, handiness and battery life.
To sum up: I’ve had 15 foxes in the last two weeks, all spotted and set up for in good time, all without calling, and none of them with an inkling of my presence. As I had the .17 Fireball with me, I even added a rat to the tally on my last outing. None of this would have been possible, let alone as easy to achieve, without Pulsar’s brilliant little thermal monocular.
click on image to enlarge

click on image to enlarge

click on image to enlarge
click on image to enlarge
click on image to enlarge
click on image to enlarge
click on image to enlarge
click on image to enlarge
click on image to enlarge

click on image to enlarge

click on image to enlarge
click on image to enlarge


