Air Venturi Nomad II Airgun Compressor
- Last updated: 23/01/2021


If you own a PCP air rifle then your immediate concern is a supply of high-pressure air. Many of us have an air tank that makes us reasonably self-sufficient. Conversely, you could just pop down to your local gun shop for a top-up, be it ongun or your high capacity bottle. But with some shops closing over the lockdown what’s the alternative.
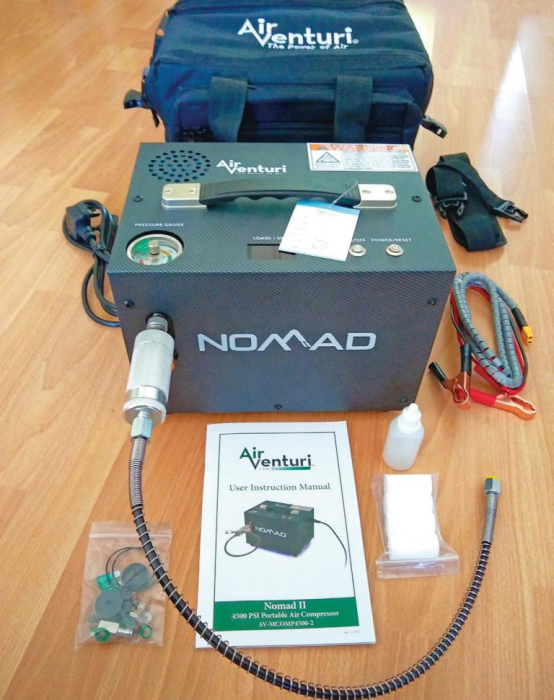
Fortunately, the market now offers a good range of pumps and compressors, purpose-built for airgun use, and most online vendors are still operating. A good example is the Air Venturi Nomad II. The feature that most appealed to me was its evident portability, as it’s compact (27 x 20 cm) and weighs a manageable 9 kg. It can be run off a car battery as well as the mains, has a sturdy grab handle on top, and comes with a carry case complete with pockets that hold all the ancillary items (hose, cables, and spares). This meant I could store it easily at home and have a ready supply of air in the field.
Compactness brings some constraints, however. Thus, although the Nomad can fill to 310 bar, it lacks the power to cope with standalone scuba tanks, being limited to cylinders of 1L or less. Nevertheless, this is plenty for most rifle on-board reservoirs. However, having air ontap arguably makes a big 300 bar cylinder somewhat redundant?
The Nomad comes out of the box with a smart black carry case with its embroidered logos and the ‘carbon-fibre’ finish, chromed buttons, and sharp decals on the compressor itself. A well-presented colour manual does a fairly good job of guiding you through the setup, operation, and maintenance procedures. The only real shortcoming was that, although importers Highland Outdoors has set it up for UK use (220V/3-pin plug), they haven’t localised the manual, which still instructs users to remove the cover; a non-trivial operation, to switch the voltage from 110V to 220V.
Normal operation is uncomplicated. You begin by fitting whatever connector your rifle requires to one end of the filling hose, then attach the other end to the compressor via its pre-installed QD connector. Then connect the power lead, attaching it first to the compressor and then to the mains or battery. As soon as you have power, the inverter fan will start. At this point, it’s a good idea to check that the brass thumbscrews for the two bleed valves (air on the side and moisture underneath) are finger-tight and that both ends of the hose are securely connected.
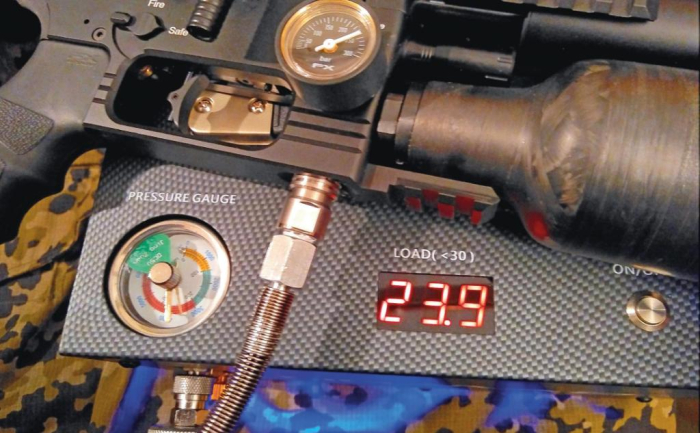
This done, turn the needle on the pressure gauge, located on the top of the housing, to your desired fill pressure, once this is reached the pump will shut down automatically. The next step is to push the POWER/ RESET button on the top of the housing. This will start the cooling fan and light up both the load indicator alongside it and a blue LED under the compressor. This one seems to be entirely ornamental, but I like it; and if you don’t, you can always switch it off! The load indicator is much more important, however, since it enables you to check how hard the pump is working.
In operation, the load reading will typically be 22-24. At 29, the pump will shut down automatically. Excessive load can be the result of trying to fill an over-sized cylinder, overheating the system by running it for over 15 minutes straight, insufficient lubrication, or mechanical issues. The first three issues are easily avoided, and doing so should prevent the last one.
To start the pump, press the ON/OFF button. The pressure gauge will show the current fill pressure. Comparing this to the digital readout on my Daystate Mk4is showed a very close match, but bear in mind that all gauges are not created equal. Running the Nomad in the garage, the noise level was significant, but didn’t have me reaching for my ear defenders; and my better half, working in her home office upstairs, didn’t even notice it. Rubber feet at each corner dampen vibration, and a set of matching washers/spacers is supplied to give more ground clearance if required.
Filling is fairly quick. Topping up the Mk4i’s 144cc cylinder from 157 to 232 bar took under a minute, and it took just over six minutes to bring the more basic gauge for the 480cc bottle of my Wolverine HiLite from the middle of the yellow section to the top of the green one. I had hoped the Nomad would fill my 500cc ‘day-tripper’ backup cylinder, too, but the pump cut out as soon as the hose filled. Something to do with the lack of a non-return filler valve on the cylinder, perhaps?
After filling, use the air bleed valve to purge the hose before disconnecting the rifle. The pressureregulated auto-shutdown will already have reset the ON/OFF button, so all that remains is to shut down the electronics with the POWER/RESET button. The inverter cooling fan will continue to run until you disconnect the power cable.
Filling in the field is similarly easy. Just connect the supplied ‘jump lead’ to your vehicle’s battery terminals (positive/red then negative/ black), and then plug the free end into the compressor. Run the engine while you fill to maintain the charge in the battery. The jump lead is quite short, so you may want to source a longer alternative to avoid having to cradle the rifle as you fill it.
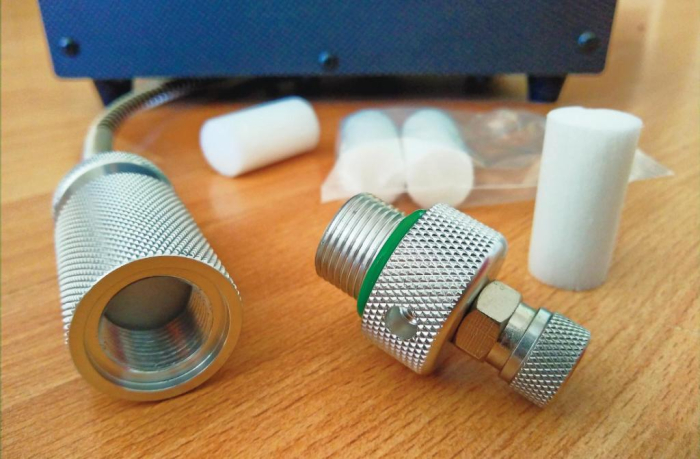
With all compressors, reliability and longevity depend on respecting the maintenance schedule. The Nomad’s manual duly provides all the intervals for lubrication (every 5 fills), replacement of the filter in the oil/moisture separator (every 2-3 hours), purging (every 20 fills), and periodic servicing by the user (every 20-30 fills). All these operations are straightforward, and the Nomad comes with all the essential spare parts, including four spare filters. Further packs are available separately from Air Venturi, but OEM alternatives can be obtained directly from China for a fraction of the price. You will also need to buy silicone oil for essential lubrication, as the oiler bottle is supplied empty! To keep track of servicing periods etc, Air Venturi provide a printed plastic wipe-clean slate for this purpose, or you could just write it down.
As usual, the internet is in two minds about the Nomad: alongside upbeat YouTube reviews, there are forum complaints about early failure and recommendations for much cheaper Chinese clones and alternatives. For the record, the Nomad is also made in China, albeit to Air Venturi’s specifications. I obviously hope my example will have a long and trouble-free life, but if things go wrong early, there’s a 12-month warranty.
The MSRP from the official UK importer Highland Outdoors is £687.99, but it’s worth shopping around for the best price. So far then, I’m very happy with the Nomad II, and it’s great to have access to all the air I need wherever and whenever I want it.

click on image to enlarge
click on image to enlarge
click on image to enlarge
click on image to enlarge


