Hydrographics Workshop Visit
- Last updated: 15/01/2018


As with many fields in life, customisation plays a big part in the shooting sports, and many of us derive great pleasure from making our kit stand out from the crowd. Custom stocks are a key part in the process, but these can command a hefty price tag. So, what if the existing production item, (which does the job perfectly well in many cases), could be decorated out of all recognition, retaining its functionality, yet transform an otherwise standard gun into something special?
John Sykes, the charismatic MD and the man behind Hydrographics, saw just such a gap in the market, and his company, based near York, now offer some eye-popping options for patterns and designs, using a high-tech dipping/ coating process, that leaves the gun dramatically re-finished. We’ll take a look at what happens in a moment- but first, a word on the driving force at the heart of this most innovative business.
As a youngster, John’s father used to restore and rebuild classic and racing cars. John soon got involved, and picked up invaluable practical experience along the way. He painted his first car when he was just 11 years old, but he also inherited an early love of motorbikes. 20 years in the printing trade followed (the old school, hot metal variety), but John was forced to consider his future, when he was involved in a motorbike accident; after which he could no longer ride, as he was sadly wheelchair bound!
With plenty of repair time on his hands, he dabbled with archery, but then discovered the shooting range, which they had set up at the hospital! Meeting top FT shooter, Andy Calpin, down the local club, was a lucky break, and he soon set about adapting his sitting position, shooting from a wheelchair. Andy was incredibly supportive and helpful, and with hard work and perseverance, John soon realised that he could compete in Field Target shooting.
Initially, he went back to his printing job after the accident. He shot an Air Arms RN10, and at this time, started experimenting, tinkering with, and improving airguns. He started to think about stock painting, and the dipping process was almost a natural progression.
In 1998, Hydrographics began dipping airguns, initially using Realtree camo, and business soon picked up, largely by word of mouth in airgun and shooting circles. As I discovered, our Editor Pete Moore had his Steyr Scout Rifle and moddy dipped in Realtree Xtra Green and at a later stage his Mini 14 GB stock camoed with a carbon fibre effect pistol grip too. Today, the company has expanded their portfolio, to prosthetic hands and artificial limbs (often treated to a chrome look), and carbon fibre finish on motor bikes and bike parts, are particularly popular. Bicycle parts and frames, aeroplanes both models and full-size parts, are all regularly processed; anything in fact, where a jazzy, modern look can bring the product to life.
The work and business has continuously evolved, and they have now carried out work for Formula One, and even some Olympic athletes who want a futuristic look added to their specialised running limbs!
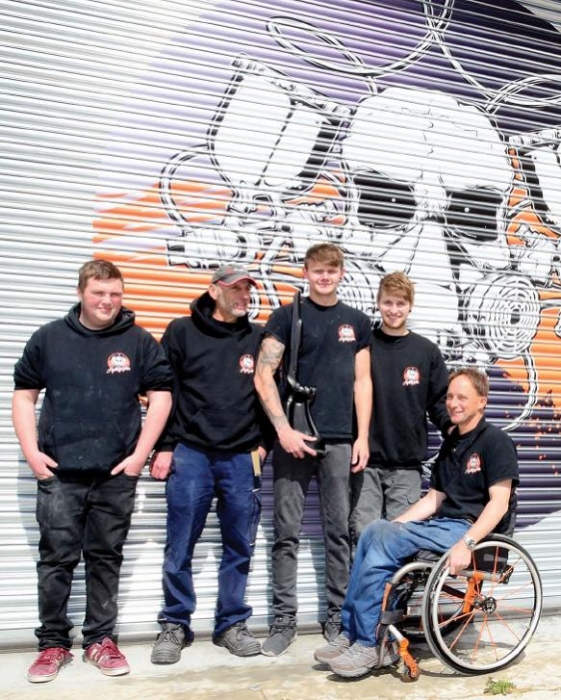
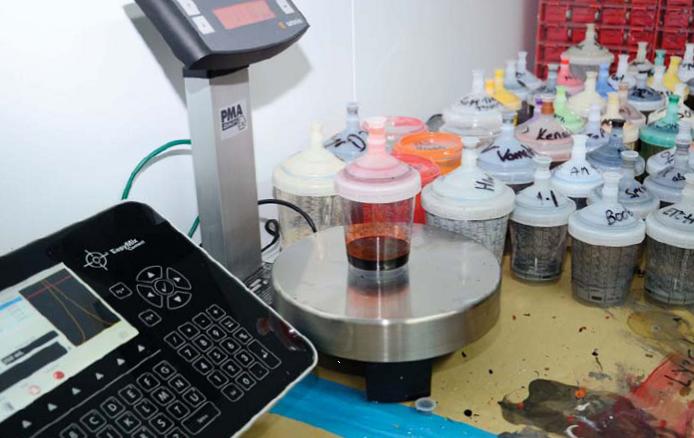
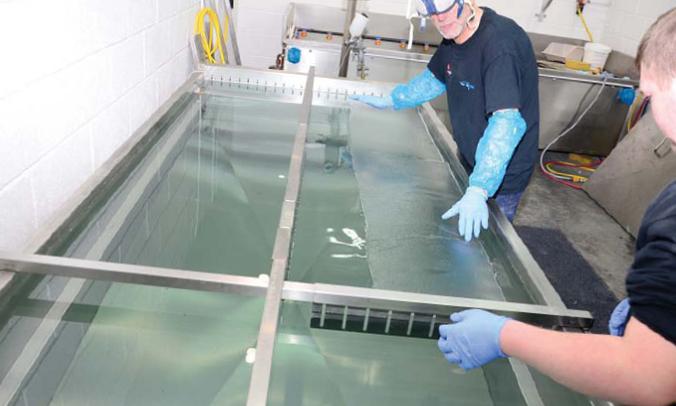
John now employs five personnel, including his son Harry, and the bulk of the business is the dipping process, which is best described as being like a giant transfer used for applying decals to model kits. Various patterns and illustrations are available, and come on a thin role of film. The artwork is floated in a special tank, the background ‘carrier’ dissolves in the water, then the object is dipped, and the picture sticks to the job. Ingenious stuff, and the results speak for themselves. John’s colour mixing knowledge has now been finely tuned, and he has an uncanny memory bank of colours and options- all available to the customer.
Hydrographics are now able to provide a range of custom colours from candy through to pearls and metal flake and xirallics, as well as plain Jane colours too. Now you know, back to the dipping itself, and the system for guns and equipment has been perfected, to get the final image just right.
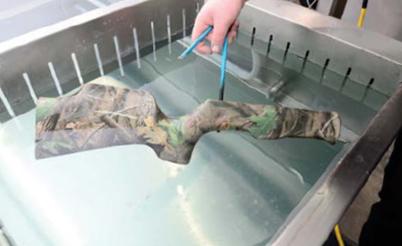
Part of the secret is the ‘split-dip’ process, whereby stocks are dipped on one side only, then on the other. This avoids a complex configuration causing possible stretching and distortion of the ink image. It does take longer, but a true pattern is achieved in the end, as it’s that bit more controllable. Tank size is altered and minimised too, so the ink image doesn’t float out of alignment. Gun-related orders to Hydrographics, are around a 50/50 split, between airguns and firearms, with F-Class and shotguns all covered, and popular projects.
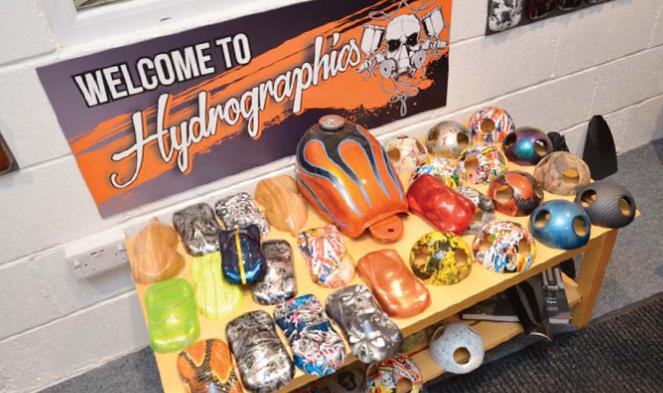
The primer stage takes around 8 hours to dry. Then the lacquer stage takes another 12 of air drying. The whole process usually takes around two days to complete; but of course, overall timescales quoted are largely dependent upon the workload and job contracts undertaken at the time. For this reason, expected time is likely to be between 2 and 3 weeks. Take a look at some of the past projects though, and it’s difficult not to marvel at the skill involved.
Hydrographics still produce occasional bespoke muzzle brakes and custom components, and these are available on request, price on application. Likewise, with the fitting of special butt hooks/pads. They can also supply any new airgun from BSA, Air Arms, Daystate and others, fully dipped if required.
1. Gun is disassembled to its component parts
2. The metal parts to be coated are then degreased, sometimes requiring heating to 120° for the full process
3. Parts are masked off as required and relevant parts bead blasted to prepare the surface
4. The relevant primer is then used, dependent upon the compound material needing treatment Etch Primer may be used. This is an acid-activated primer to get the coating to stick successfully
5. Thermo plastics require a Plastic Primer pertinent to each compound
6. Wooden items such as stocks require certain parts/areas to be thoroughly sealed in preparation. With the butt pad removed, the grain needs to be sealed with a 2-pack compound. Likewise, the inside of an adjustable cheek-pieceanywhere where semi exposed grain is present. This preparation is done to stop water ingress during the dipping stage
7. A High-Build primer is then used. This is normally allowed to dry for around 8 hours. Everything is sanded to remove any blemishes
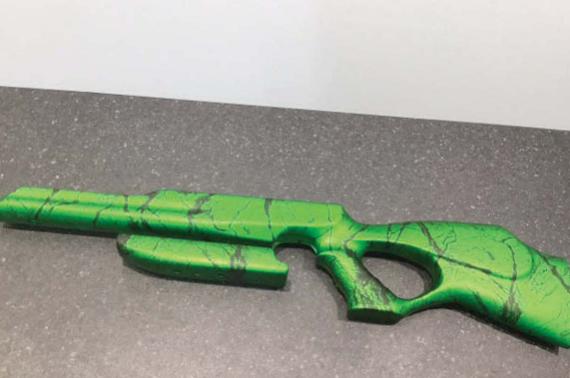
8. A background base coat is sprayed on. There are many different colours used, again, dependent upon the proposed finished artwork. The lightest highlighted part is usually the background base coat
9. Now the dipping process takes place. The ink image, as mentioned, is effectively held on a carrier film, which is laid out in the tank. The film then dissolves in water, after a pre-determined time, which is spread with an activator, which gives an aqueous image allowing it to conform to the contours of the job
10. The job is then rinsed and given a check over for any defects
11. After a further drying period, the job is then sprayed with lacquer.
12. The job is then baked for 45-50 minutes at 60-70° C.
13. Once the job is fully cured, it goes through what’s called the ‘denibbing’ process, which removes any dirt, and adds a final polish.
Fancy having your own gun dipped? Then contact John Sykes and the team at Hydrographics on Tel 07908 531649/ 01904 778188 [email protected]
All full gun dips, whether shotgun, rifle or airgun: £225plus VAT plus carriage =£288
Stock only standard: £110plus VAT plus carriage =£150
More elaborate Target /FT stocks: POA
Action only: POA
Moderator dipped small: £25 plus VAT /large £35 plus VAT Scope £55-£60 plus VAT
click on image to enlarge
click on image to enlarge
click on image to enlarge
click on image to enlarge
click on image to enlarge
click on image to enlarge
click on image to enlarge


