Getting into Field Target Shooting Part 3
- Last updated: 26/06/2017


With your FT rifle hopefully sorted, it’s now time to look at suitable optics so let’s consider some options.
FT allows the scope to be used at any magnification the shooter desires with adjustments on the fly but requires something capable of at least 25x with good eyes. This allows it to be used to `range find`, or focus on the target, using its shallow depth of field at high mag. Most shooters use upwards of 35x for focusing. Actually taking the shot is down to personal preference.
Shooting distances go from 10 to 55 yards. All but designated kneeling and standing lanes must be shot in the customary sitting FT position unsupported. If you are reasonably able bodied and like gadgets and `twiddling`, this is the one for you! Finally, if you just wish to enjoy your rifle outside of official competitions, shooting any way you choose down at your local club, the choices become more plentiful with the following considerations
Other than for FT, a 3-12x40 or 4-16x44 would be a good choice, giving enough magnification for the longer targets with the option to turn the power down when required. The first figure is the minimum magnification and the second the maximum. The third denotes the diameter of the front or Objective lens. The other consideration is the tube size. The two popular ones are 1”/25mm and 30mm. Neither is better than the other, except that the larger tube will allow more elevation adjustment for long range, although this will not affect our air rifle distances! So, you will need either 25 or 30mm rings to suit!
Parallax adjustment is also something to consider when shooting at higher magnifications. Set at 12x, the target may be perfectly clear at 30 yards, but look at something 15 yards away and it will be blurred and very difficult to make out the spot you need to be aiming at. It will also suffer from Parallax error! This is when the reticle moves together with your eye movement and is caused by the focal plane of the scope falling in front of it. Not recommended for accurate shooting! This error increases at closer ranges and higher magnifications and can mean as much as 10mm from the intended impact point.
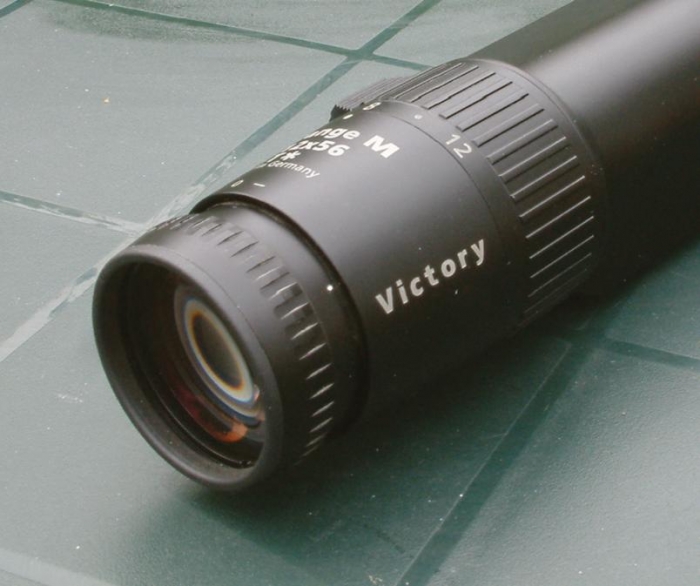
Fortunately, error and focus more or less coincide with each other. Scopes fitted with parallax adjustment allow us to re-focus the target and practically eliminate the error by placing the focal plane and the reticle in a spot where they coincide. On some scopes, the adjustment is done on the front objective lens! More popular is to position it on the left of the saddle in the form of a turret, which is more user friendly!
A 4x fixed power scope with no adjustment is usually set parallax free at around 30 yards and will be pretty much parallax free at all our air rifle ranges but down on power for target use. There are less options when choosing for FT but it is still possible to get into budget level High Mag/side focus scopes for under £300. Here are a few suggestions:
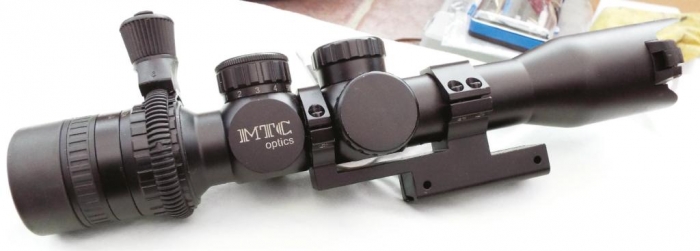
The MTC Viper Connect is a good example of a popular general purpose scope. 3-12x24 or x32 versions with side focus have a huge field of view by eliminating eye relief. Ideal for non-recoiling weapons. Excellent specifications and value at around £230! Hawke make great value scopes. Their Panorama offers parallax adjustment in a 4-12x50 package that is hard to beat at well under £200. Nikko Stirling offers their Targetmaster and Nighteater series of high mag scopes. A great budget entry scope for FT at under £300!
The mounts are a different matter and require some thought before purchase. They are not just something to clamp the scope to the rifle. All the types discussed here are of the two piece variety. As explained earlier, their inside diameter relates to the scope tube size and can be as large as 34mm. They are also available in straight or `reach forward` design which allow more eye relief.
Low mounts may not be an option if the scope has a large front (objective lens). It may require medium or even high mounts just to clear the barrel. High mounts can be used even with a smaller objective lens for other reasons. For example, to lift the head up into a more comfortable position when the rifle is shouldered, although this leads to other things. Usually, when extending the scope height, the cheekpiece will also need to be extended to avoid the head `floating` without any contact with the stock.
The height of the mounts will also determine how the trajectory of the pellet behaves from muzzle to target. This is something for next month but in a nutshell lower mounts mean a more gradual trajectory out to around 20 yards, making it easier to hit closer targets as the ranging doesn`t have to be precise. Higher will cause the trajectory to climb steeply from the muzzle requiring precise range estimation to keep within 15 or 25mm of a circle. The upside of the highs is that the trajectory is somewhat stretched out, with less pellet drop at longer ranges. This allows a bit more error in the range estimation with a better chance of success.
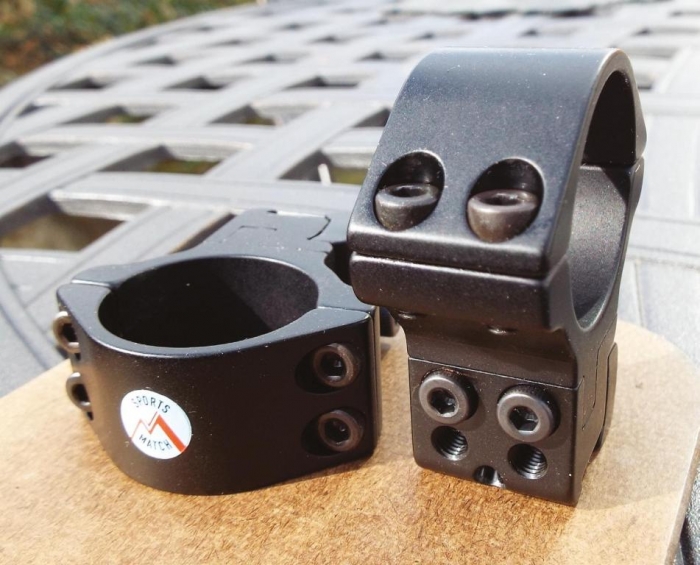
If you really want things spot on then you may want to go for adjustable mounts and you need look no further than Sportsmatch UK! They make for every discipline, including their excellent, 2-piece adjustable set. Available as up/down plus right/left or just up/down adjustable, they allow the scope to be `optically centred` with all external adjustments being in the middle of the adjustment range. This ensures that the best possible sight picture is available through the centre of the optics. I use the single adjustment set, up and down only, and have found them to be perfect for my needs.
More on set up next month.
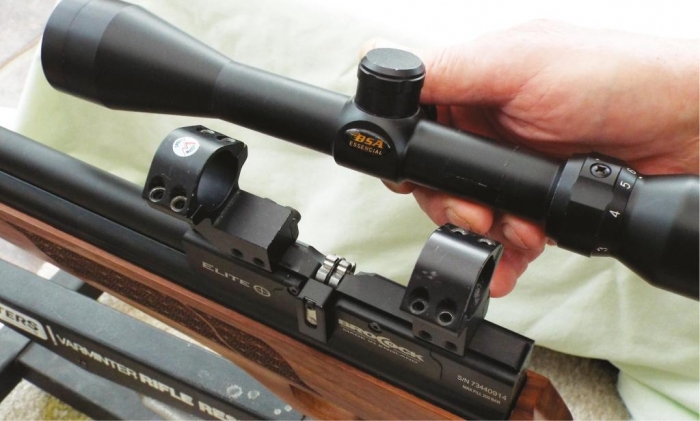
Keep the base mounts as far apart as possible on the scope rail. This distance will vary between rifles depending on the length of the rail. The further apart you get them, the less prone they become to accidental knocks, which can cause a change in the zero (PIC 1).
Once the distance is decided, tighten the clamps securely and evenly a bit at a time.
After placing the scope into the cradle of the mounts, fit the top clamps loosely with just a little friction to stop the scope from sliding freely but loose enough to enable you to move it. Now check that you have the correct `eye relief`. That is the distance from your eye to the eyepiece (PIC 2). The way to do this is to close your eyes and mount the rifle to your shoulder then open your eyes! The view should be a perfect circle to the periphery of the lens. Now is also the time to adjust the reticle for sharpness by looking skywards and turning the focusing adjuster at the rear of the scope until it’s sharp and clear.
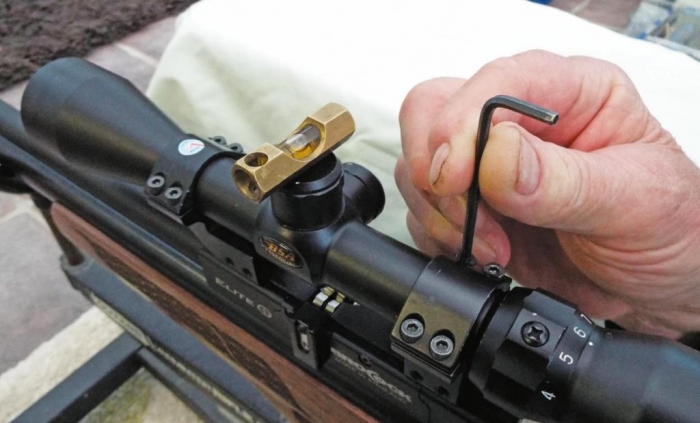
Next is to align the reticle vertically with the rifle (PIC 3). Don’t rely on just shouldering the rifle and guessing the setting! I have been amazed at how far off vertical it can be using this method. The rifle will end up being `canted` to one side, more of this in a moment.
One method is to set up using a gun-vice or similar, using a small spirit level to make sure that it is absolutely upright, then hang up a piece of weighted string some distance away or focus on a vertical or horizontal post. Look through the scope and align the vertical line of the scope with the string or object. Don’t be surprised if it looks a mile out when you shoulder the rifle. It is now showing up your natural canting position. A level bubble on the rifle will keep this in check. You now need to tighten up the top mounting straps (PIC 4).
Again, frustration can set in because having gone through the above procedure meticulously you find that after tightening up the straps the scope has rolled off vertical!
Be sure to tighten the strap bolts evenly and just a tad at a time. A spirit level on top of the scope can help during this operation. The gap between the top strap and the base mount should be even on each side when fully tightened. Go easy with the muscle power. Nipping up the bolts after having applied a drop of `LocTite` is much better than proving how easy it is to strip a thread or bend an Allen key! A final check on alignment and you’re good to go.
The addition of some scope caps to keep the grit away and maybe a screw on sunshade for the front if it has provision for one when shooting against a bright background and it`s ready to be zeroed. More choices here and next month we will look at the options in detail.
Good shooting
Terry Almond
click on image to enlarge
click on image to enlarge

click on image to enlarge

click on image to enlarge
click on image to enlarge
click on image to enlarge

click on image to enlarge
click on image to enlarge


